Overview
Item Inventory Levels allow you to control how many times a menu item can be sold on a specific day. Once the daily limit is reached, the item will no longer be available for that date.
This is especially important for items with limited availability, such as rentals, specialty desserts, or equipment that can only be used a certain number of times per day.
Inventory levels are optional, but strongly recommended for any item you can't oversell.
Tip: When editing menus, avoid working in multiple CaterZen tabs at the same time. Changes may not save correctly. If updates don’t appear, you may be prompted to clear your menu cache.

When to Use Item Inventory Levels
Item Inventory Levels are helpful if:
You have a limited quantity of an item available per day
You want to prevent double-booking rentals or equipment
You sell items that cannot be replenished same-day
You want CaterZen to automatically manage availability
Common examples include:
Rental items (chafers, tables, beverage dispensers)
Specialty desserts or baked goods
Equipment shared across events
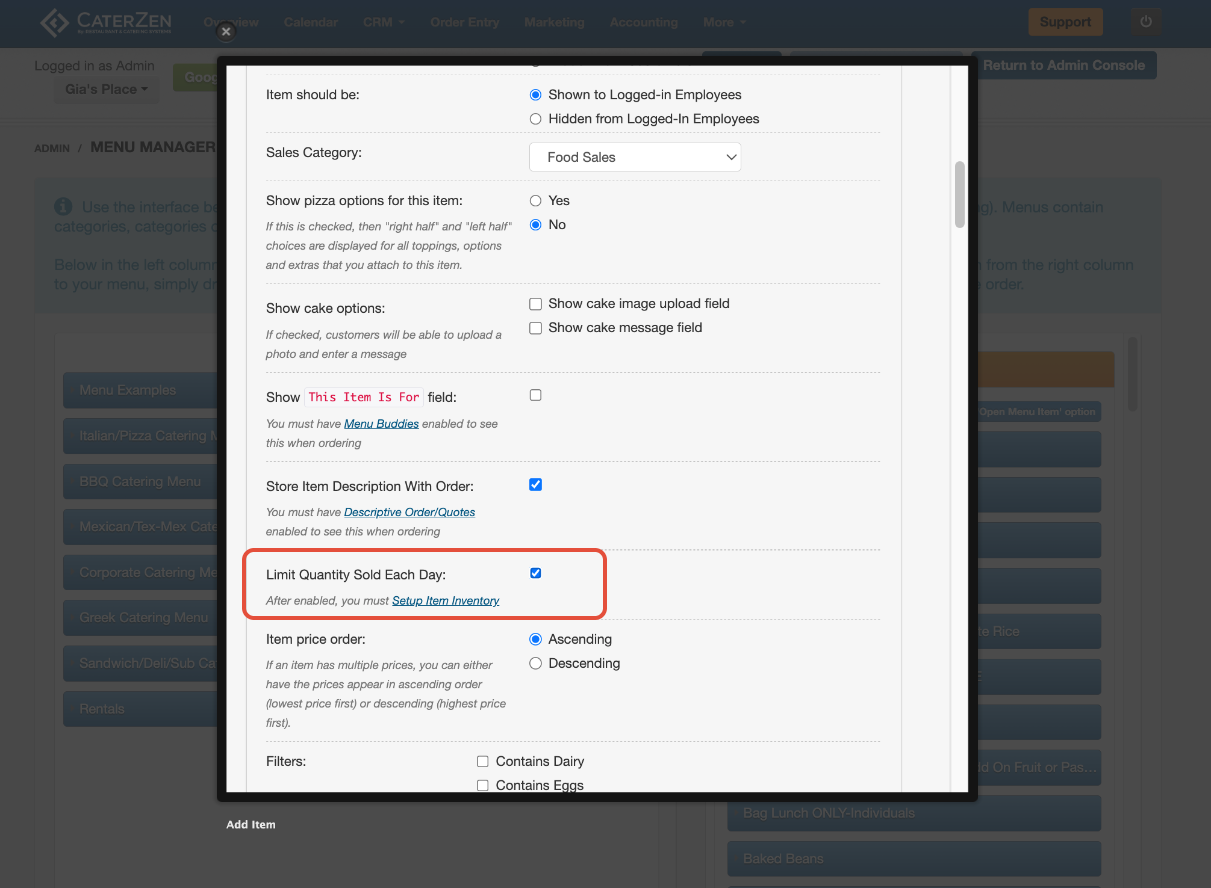
Step 1: Enable Inventory Limits on an Item
Inventory limits are enabled directly on the menu item.
Go to Admin → Menu
Click Menu Manager
Locate the menu item you want to limit
Click Edit Item
Scroll down to Limit Quantity Sold Each Day
Check the box
Click Save This Information
This tells CaterZen the item should be tracked by inventory.
Step 2: Set Inventory Quantities by Day
Once inventory tracking is enabled, you’ll define how many of the item can be sold per day.
Go back to Admin
Under Menu, click Item Inventory

Select the location (if applicable)
Find the item in the list
Enter the quantity available for each day of the week
Leave a day blank if the item should not be limited that day
Use the Tab key to move between fields and save entries
Inventory levels are tracked by event date, not order date.

How Inventory Levels Work
Each time an order is placed, the available quantity is reduced
Once the daily limit is reached, the item is no longer available
Availability updates automatically as orders are added or edited
Inventory is managed per location if you have multiple locations
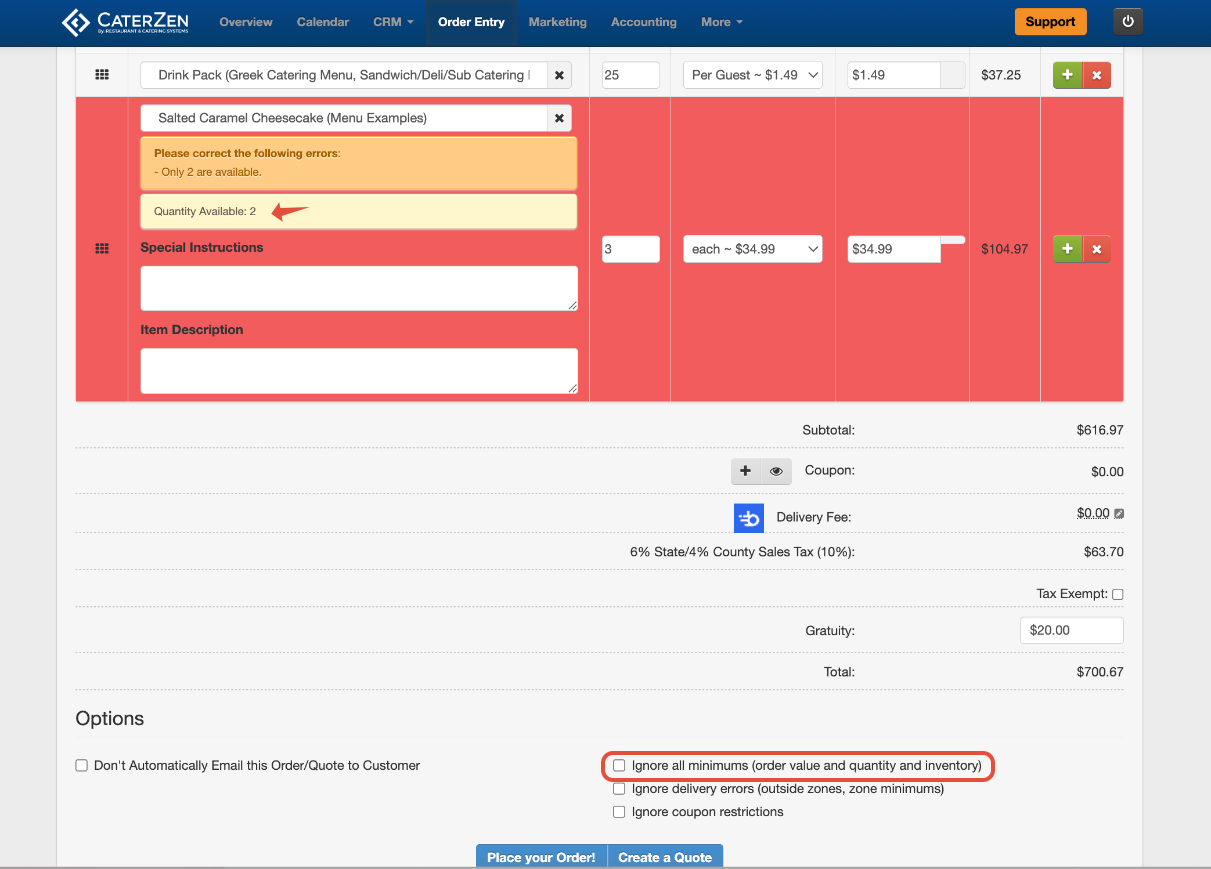
What Employees and Customers See
During Order Entry (Employees)
The remaining quantity appears under the item
Employees can see when inventory is running low or exceeded
Overriding Inventory Limits (Employees Only)
Employees can override inventory limits (if permitted) by checking the box Ignore all minimums (order value and quantity and inventory) This allows flexibility for:
Last-minute adjustments
Special approvals
Internal orders
Overrides do not apply to Customers placing orders online.
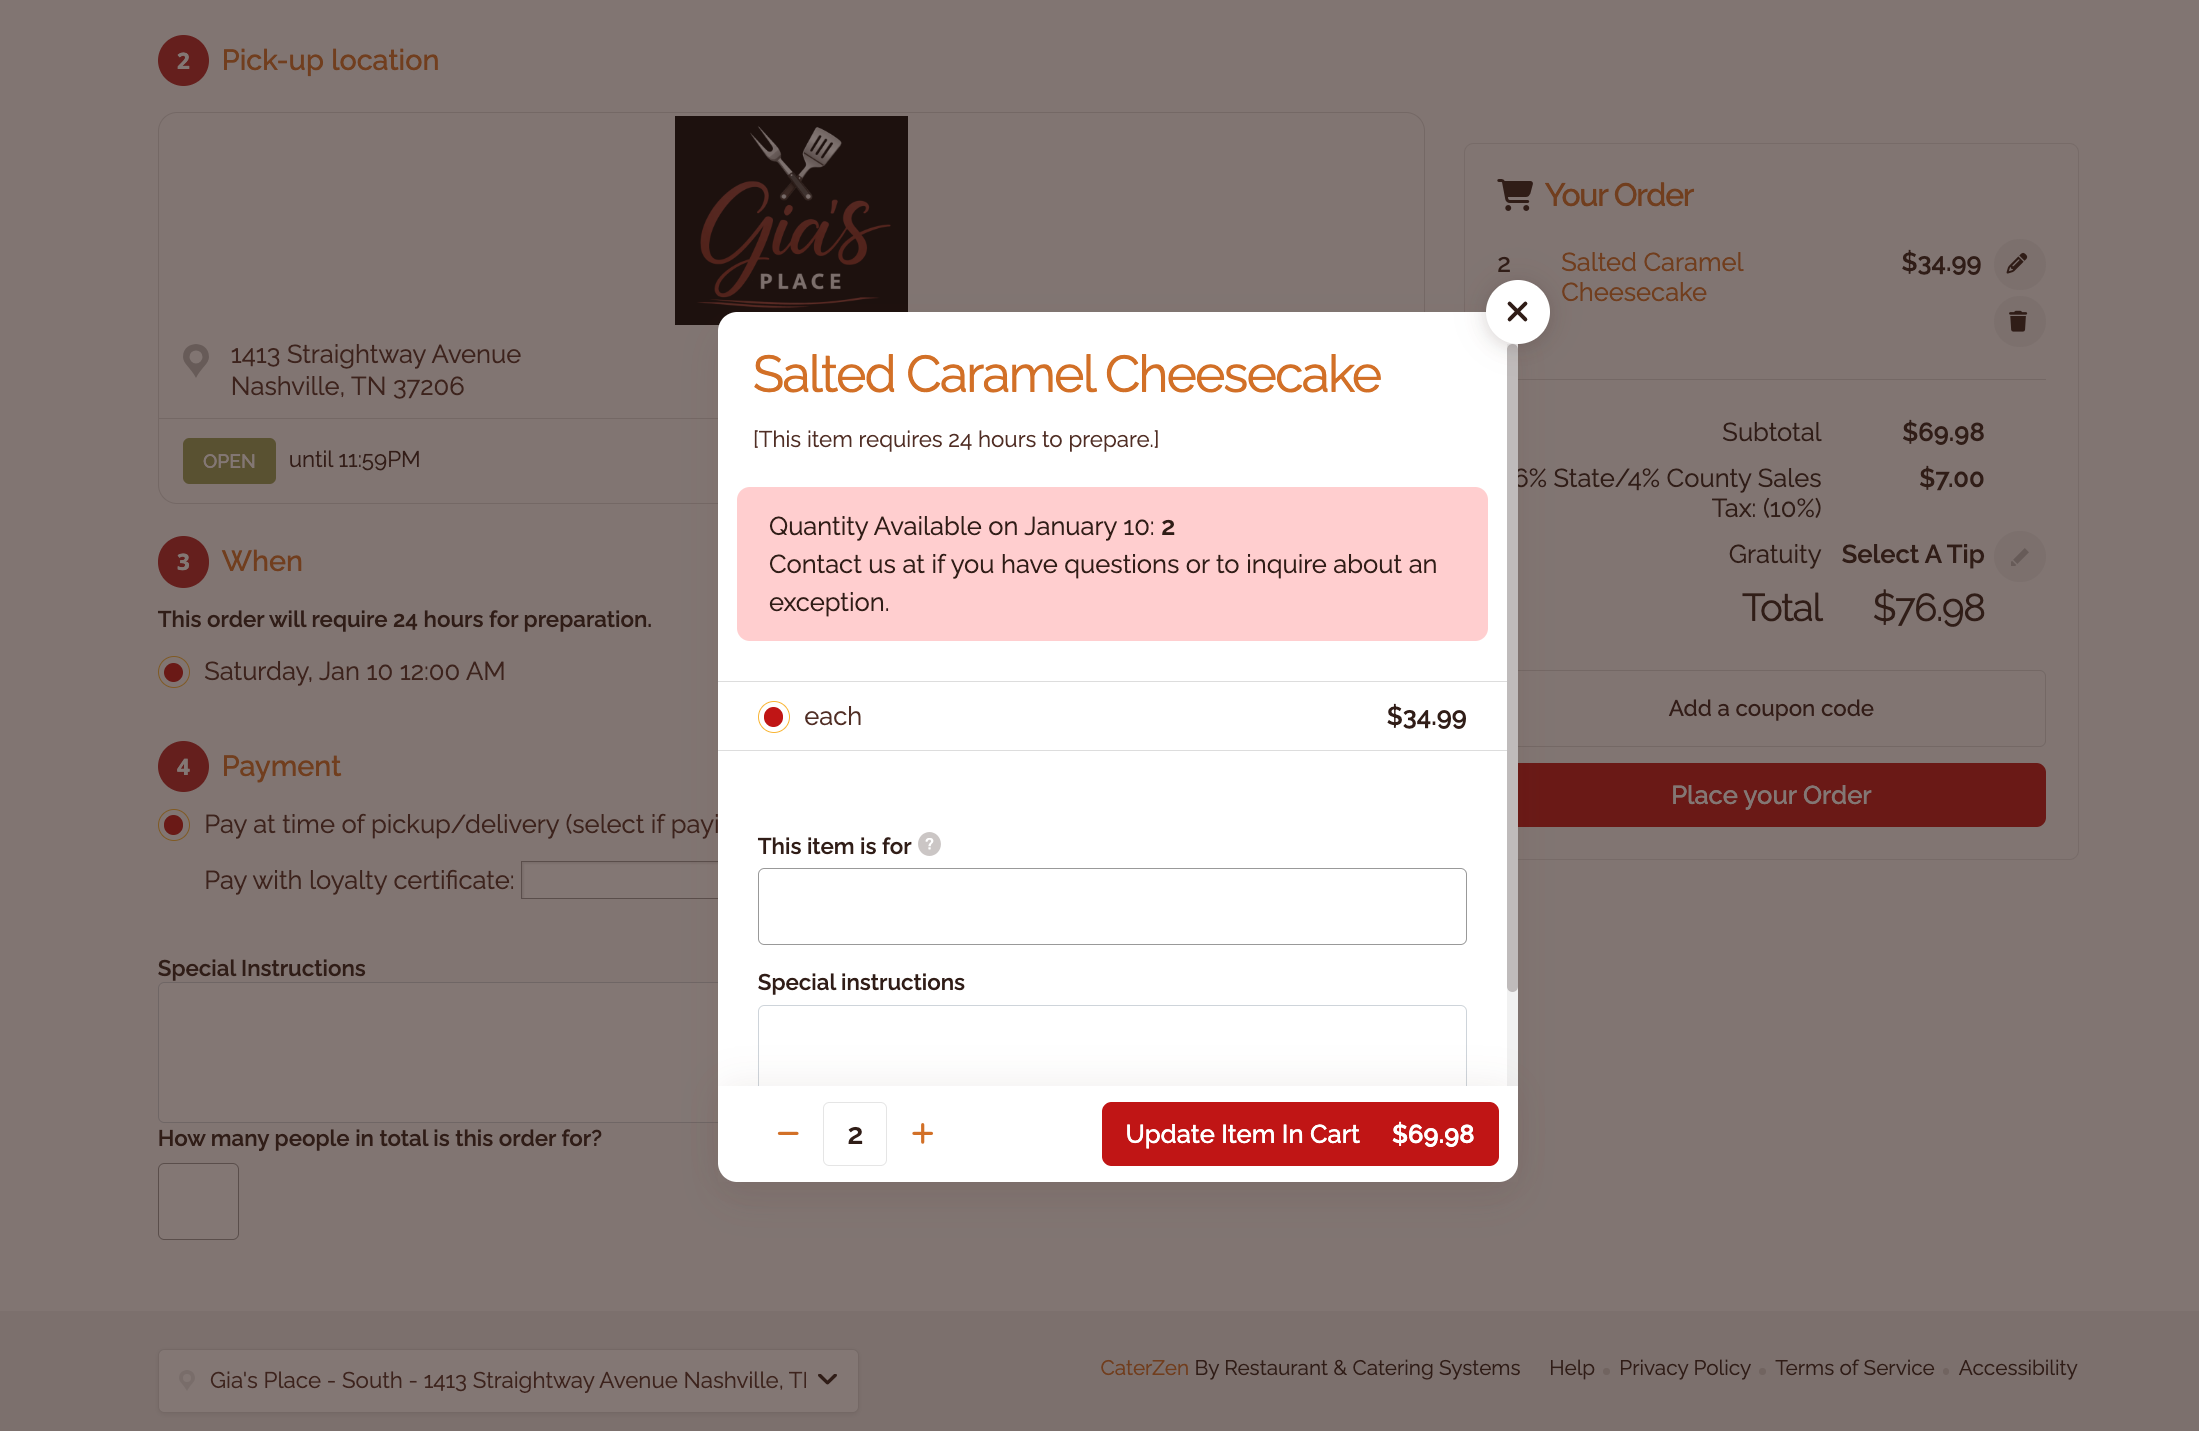
Online Ordering (Customers)
Customers see a message indicating limited availability
Items are removed automatically once sold out for the day
Best Practices
Enable inventory levels for all limited-quantity rental items
Review inventory before high-volume or peak days
Keep quantities realistic based on logistics, not just totals
Revisit inventory settings seasonally or when equipment changes
Common Questions
Why is my item still available after selling out?
Confirm inventory limits are enabled on the item and quantities are entered for that day.
Why can employees add more than the limit?
Employees can override inventory limits during order entry.
Why doesn’t the item appear in Item Inventory?
Only items with “Limit Quantity Sold Each Day” enabled will appear.
Related Articles
Support
If you’re unsure which items should use inventory levels or need help setting them up correctly, our CaterZen Support Team is happy to help.
Not a CaterZen customer yet? Discover how our catering software can streamline your business — click here to learn more!