Overview
Menu Items are the individual products Customers and employees order from a menu. A menu item can represent food, beverages, rentals, or other items added to an order. Menu items live inside categories, which live inside a menu.
Before adding menu items:
A menu must already exist
At least one category must be created within that menu
Menu items can be customized with pricing, inventory limits, add-ons, images, and advanced option behavior.
Menu hierarchy reminder:
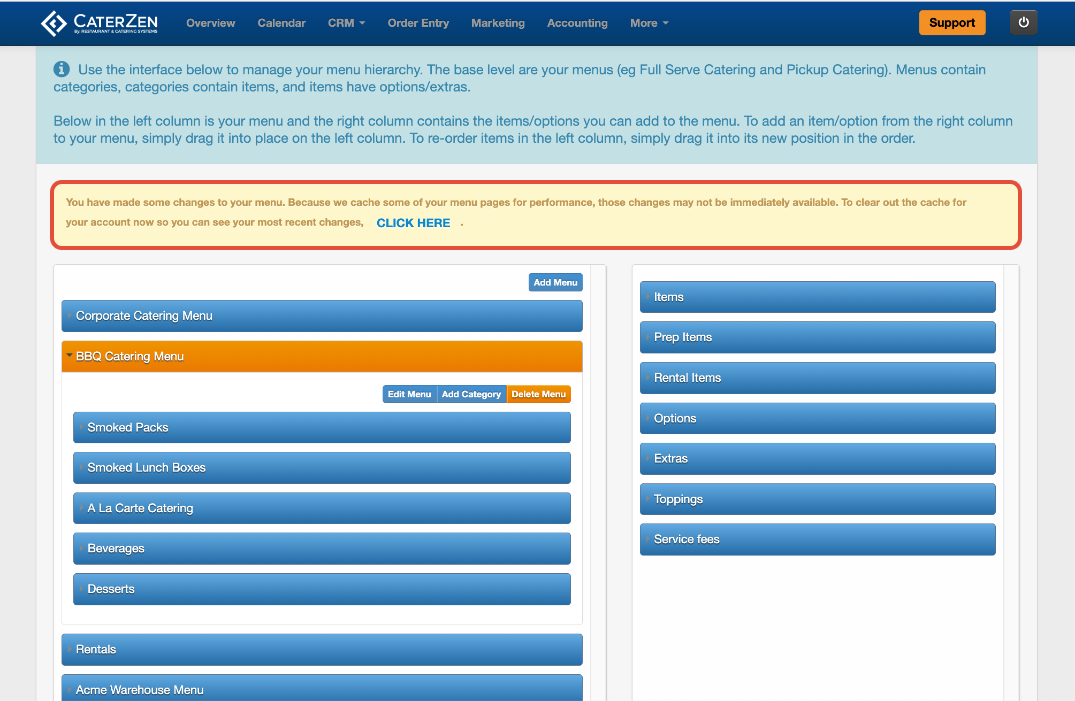
Visual cue:
When you select a menu, category, or menu item on the left, it will highlight in orange. This indicates the active item you are currently editing or assigning to.

⚠️ Working in Multiple Browser Tabs
When making menu changes, we recommend working in a single CaterZen tab.
CaterZen can be opened in multiple browser tabs, but making menu changes in more than one tab at the same time can cause changes not to save correctly.
For best results:
Complete your menu changes in one tab
Save your changes and clear your menu cache before navigating elsewhere
Refresh your browser if you switch tasks
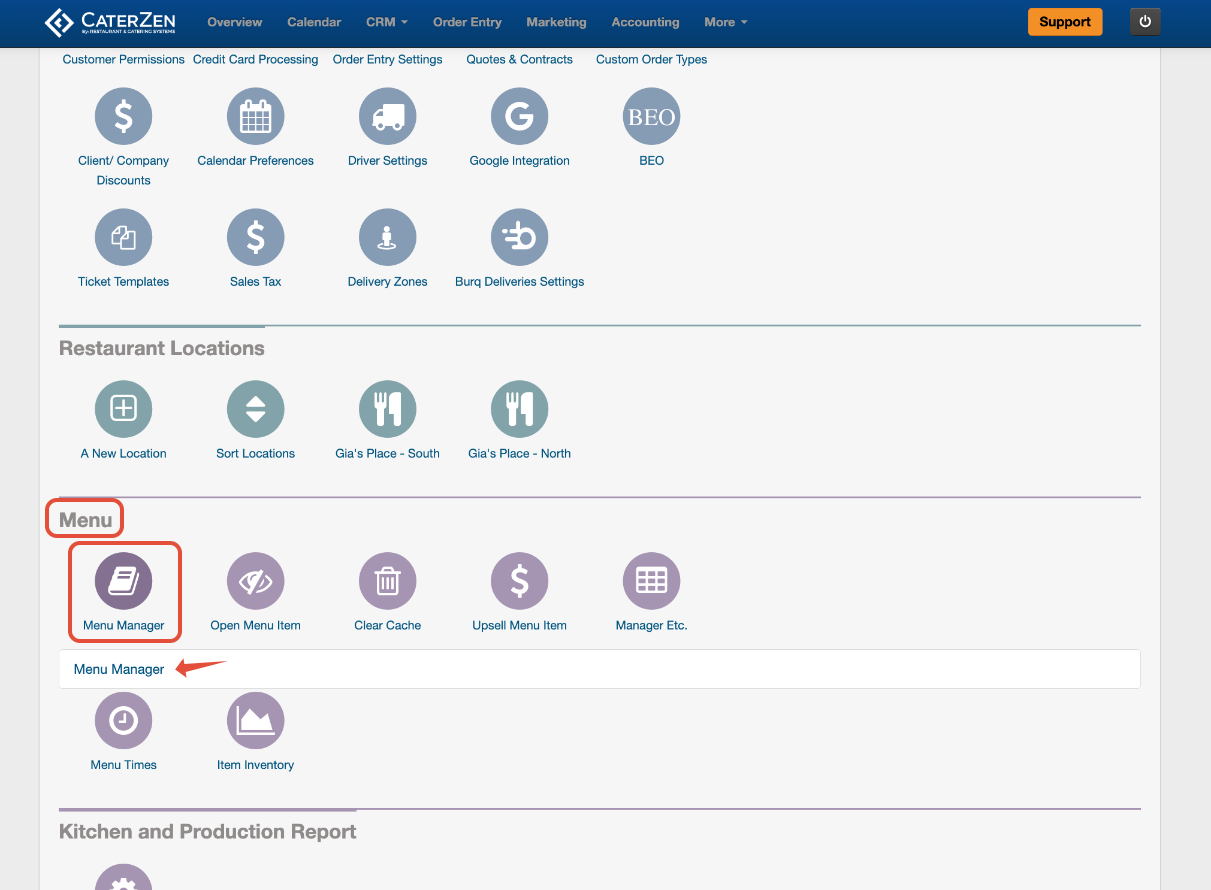
Access Menu Manager
Go to Admin → Menu
Click Menu Manager
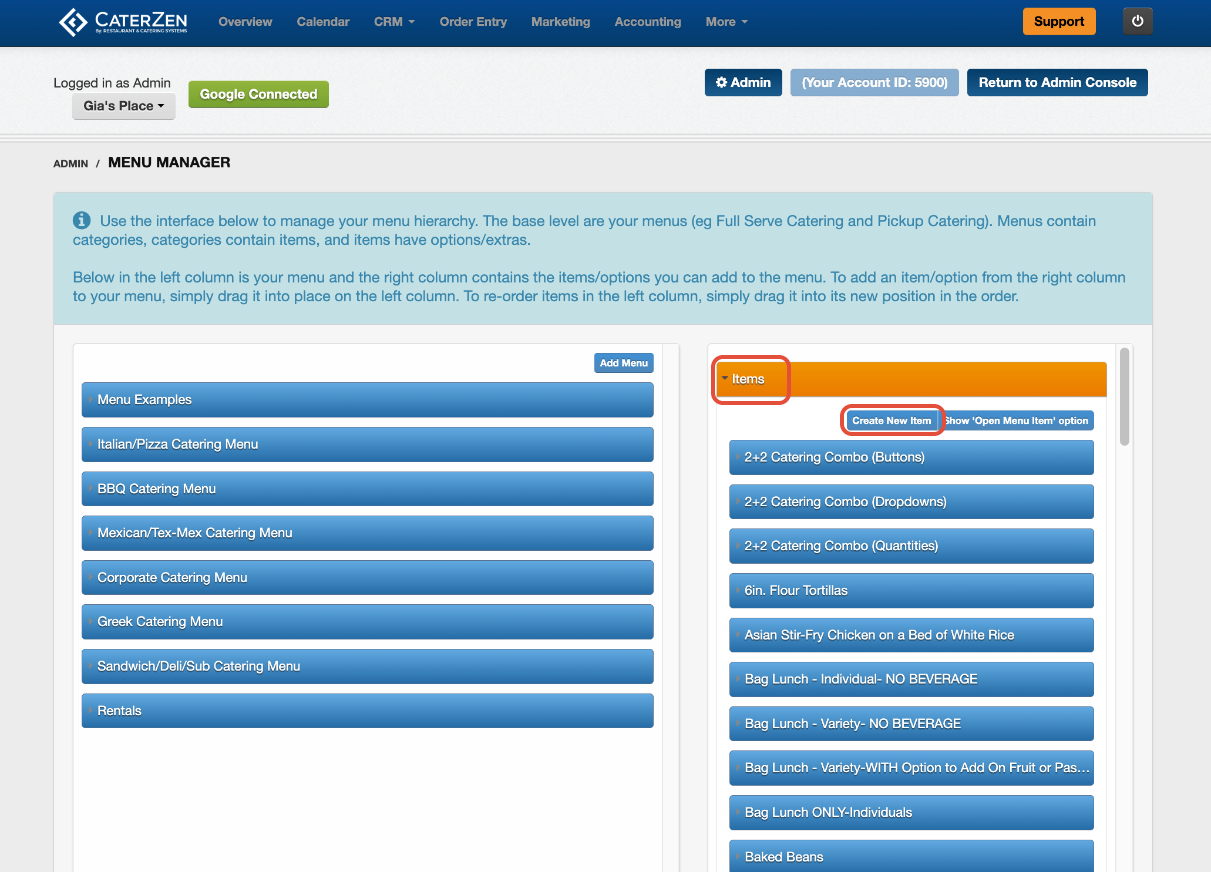
Select the Items tab on the right
Click Create New Item
A new menu item editor will open.
Menu Item Fields
Below is a breakdown of each field in the order it appears when creating a menu item.
Display Name
The name of the menu item as it appears on menus, orders, and reports.
Description / HTML Editor
Shown to Customers in Online Ordering. Use this field to describe portions, sides included, or special details. Descriptions are visible to Customers if enabled.
Minimum Preparation Time
Sets the minimum advance notice required for this item.
Helpful for items that require additional prep time.
Minimum Number Required to Order
Sets a minimum quantity that must be ordered for this item.
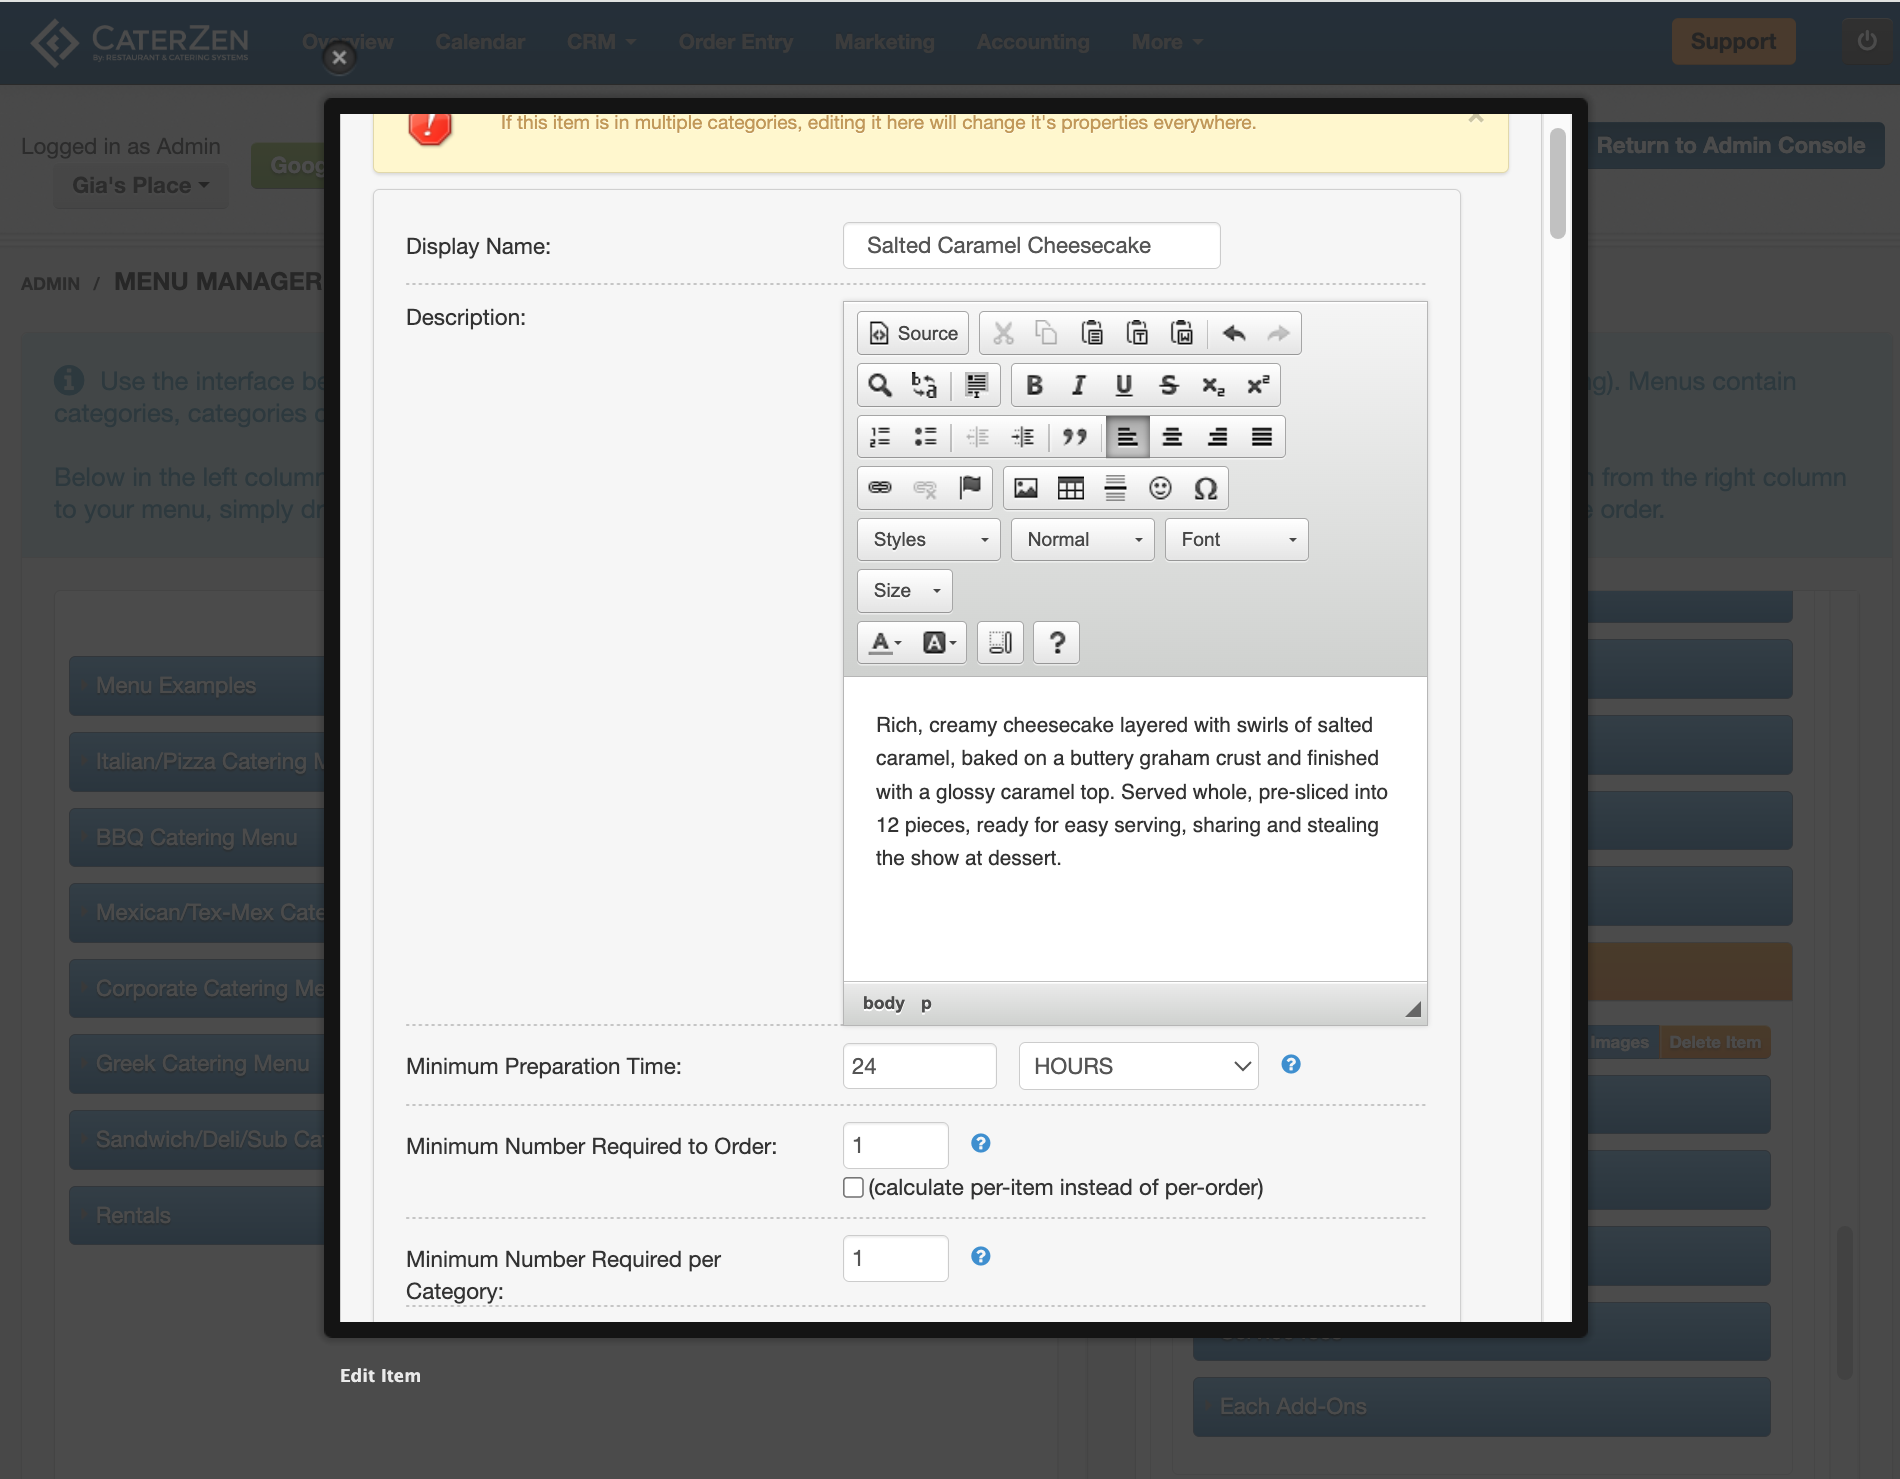
Minimum Number Required per Category
Requires a minimum number of items ordered within the category.
Example: Require at least 10 total dessert items.
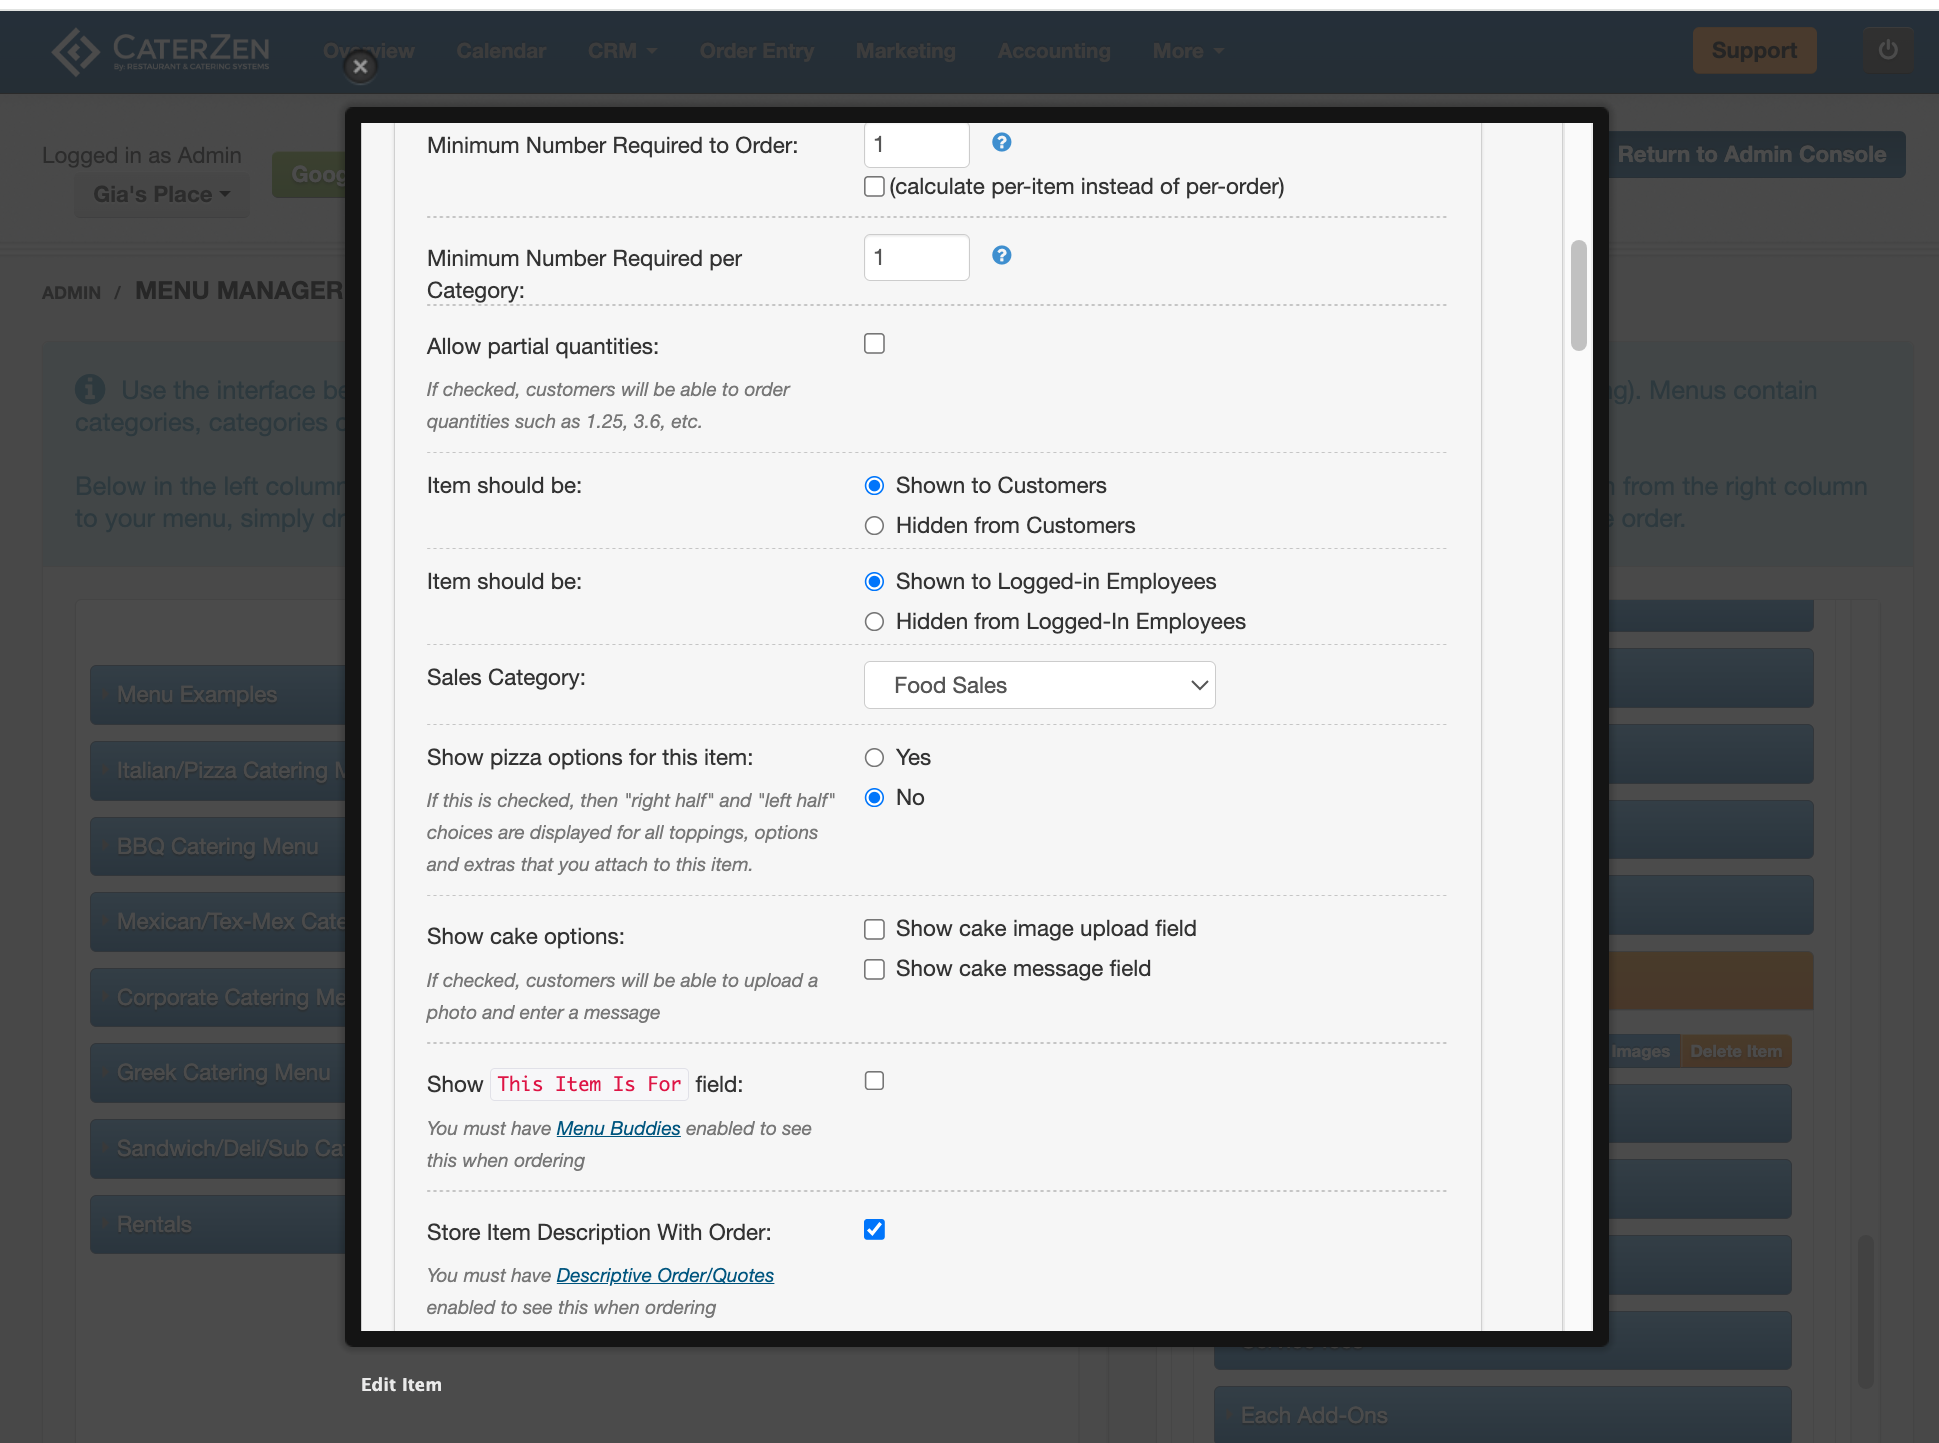
Allow Partial Quantities
Allows Customers or employees to order fractional quantities
Example: 1.5 lbs, 2.25 trays.
Item Should Be (Customer)
Controls visibility to Customers.
Show to Customers
Hidden from Customers
Useful for internal-only or temporary items.
Item Should Be (Employee)
Controls visibility to logged-in employees.
Show to Employees
Hidden from Employees
Sales Category
Determines tax behavior and reporting category for the item.
Show Pizza Options for This Item
Enables pizza-specific options if this item is a pizza.
Show Cake Options
Adds cake-related features:
Cake image upload
Cake message field for Customers
Show “This Item Is For” Field
Enables Menu Buddies for this item only.
Commonly used for boxed lunches or individually labeled meals.
Store Item Description With Order
Stores the item description directly on the order.
Useful if descriptions change seasonally but need to remain accurate on past orders.
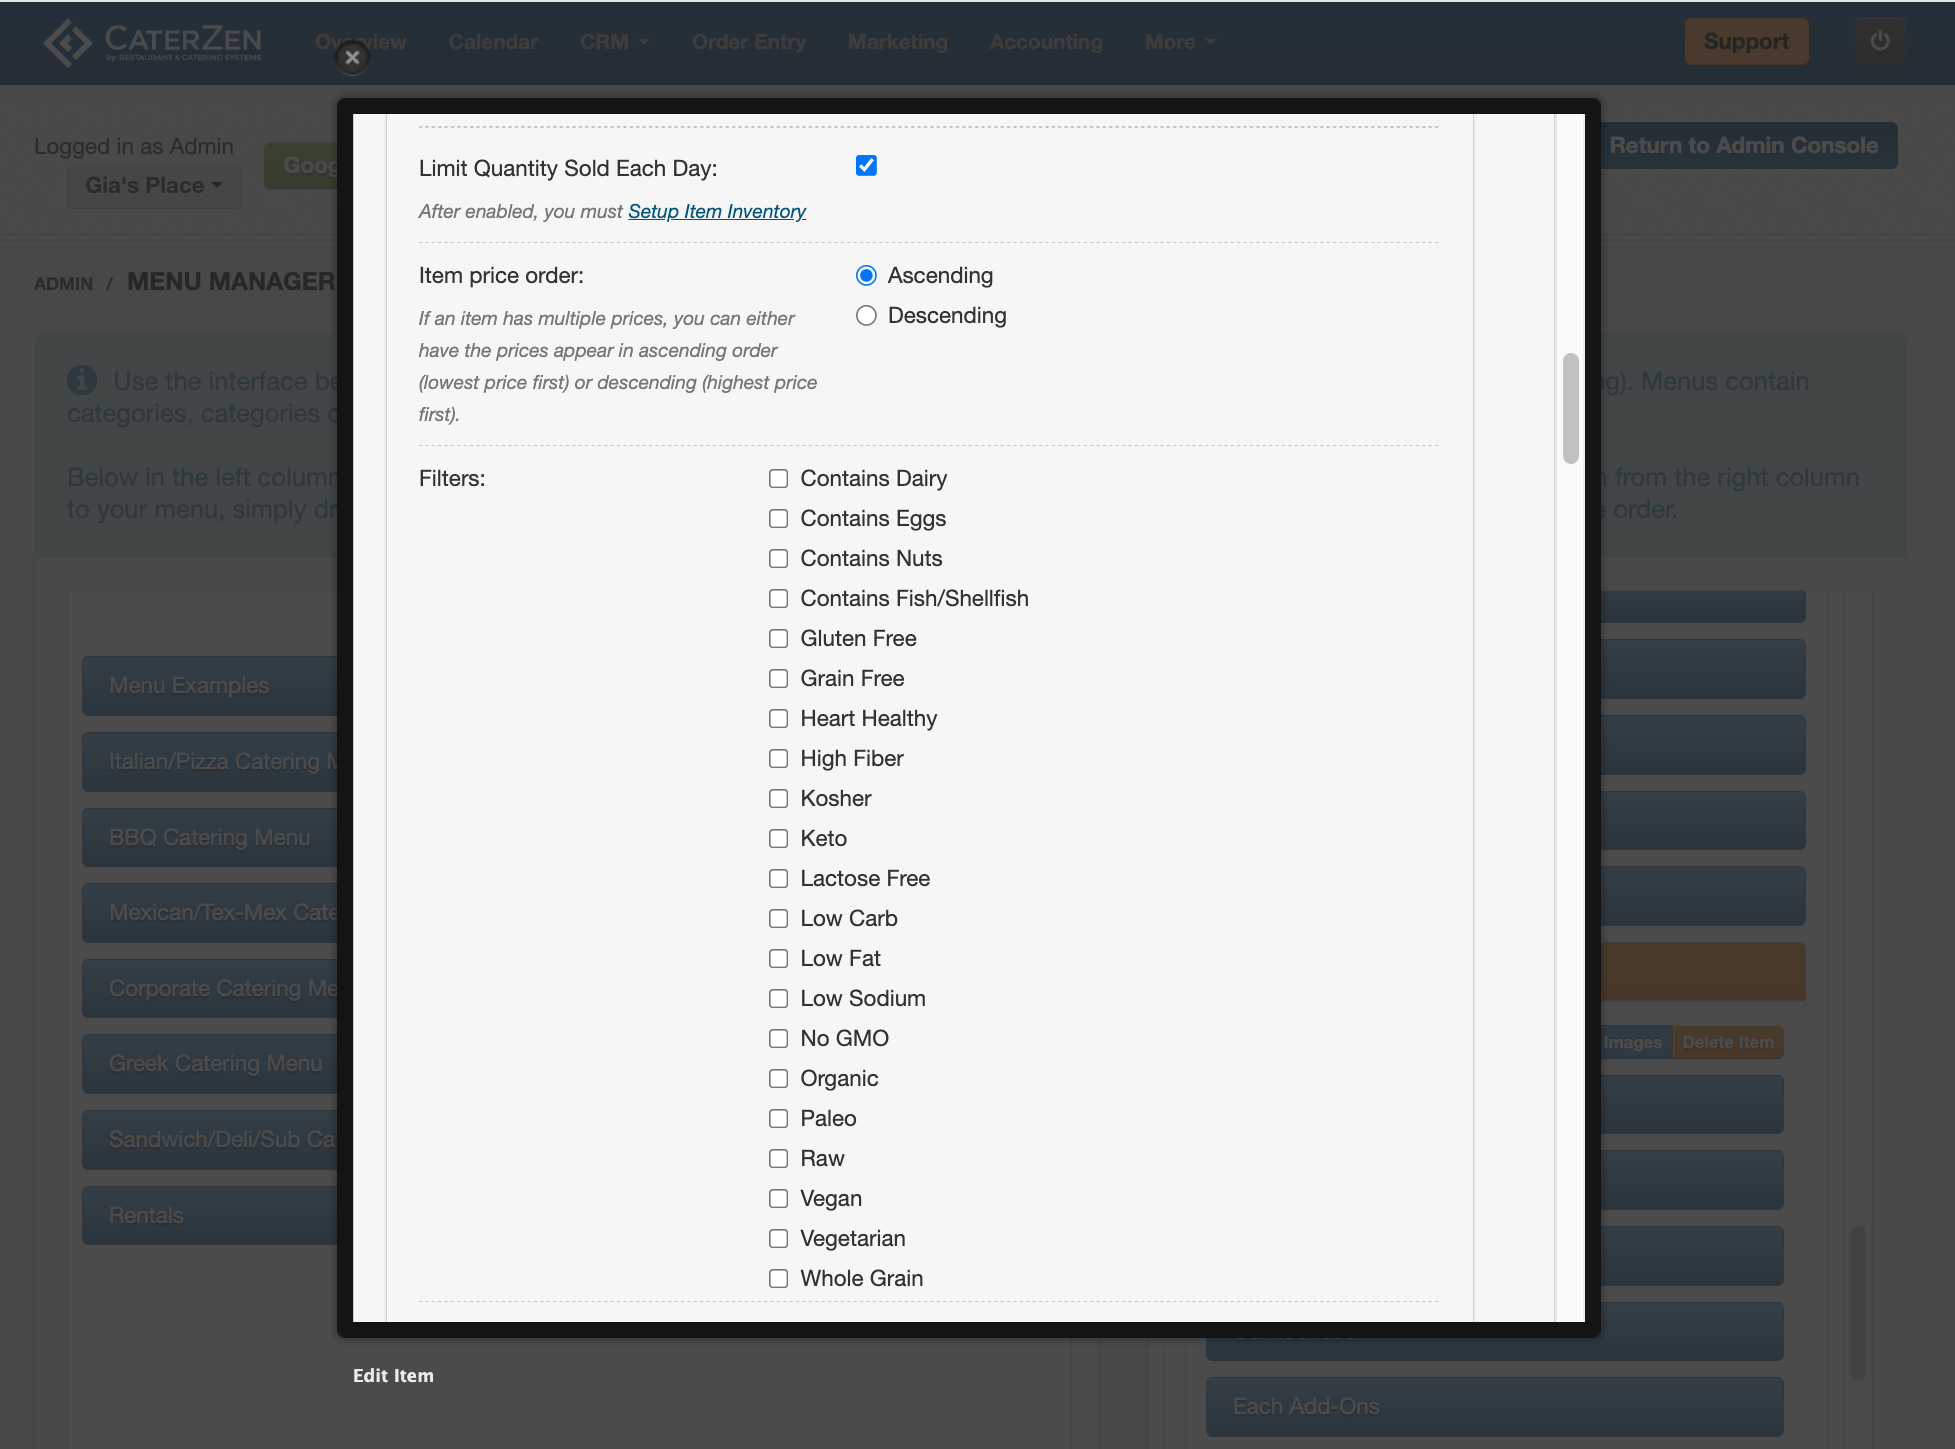
Limit Quantity Sold Each Day
Enables inventory tracking for this item.
Use this for items with limited availability such as rentals or specialty items.
Inventory quantities are managed separately. See: Item Inventory Levels: Limit How Many Items Can Be Sold Per Day
Item Price Order
Controls how multiple prices are displayed:
Ascending (lowest to highest)
Descending (highest to lowest)
Filters
Dietary and attribute labels such as:
Dairy
Eggs
Gluten Free
Vegan
Keto
These are informational only.
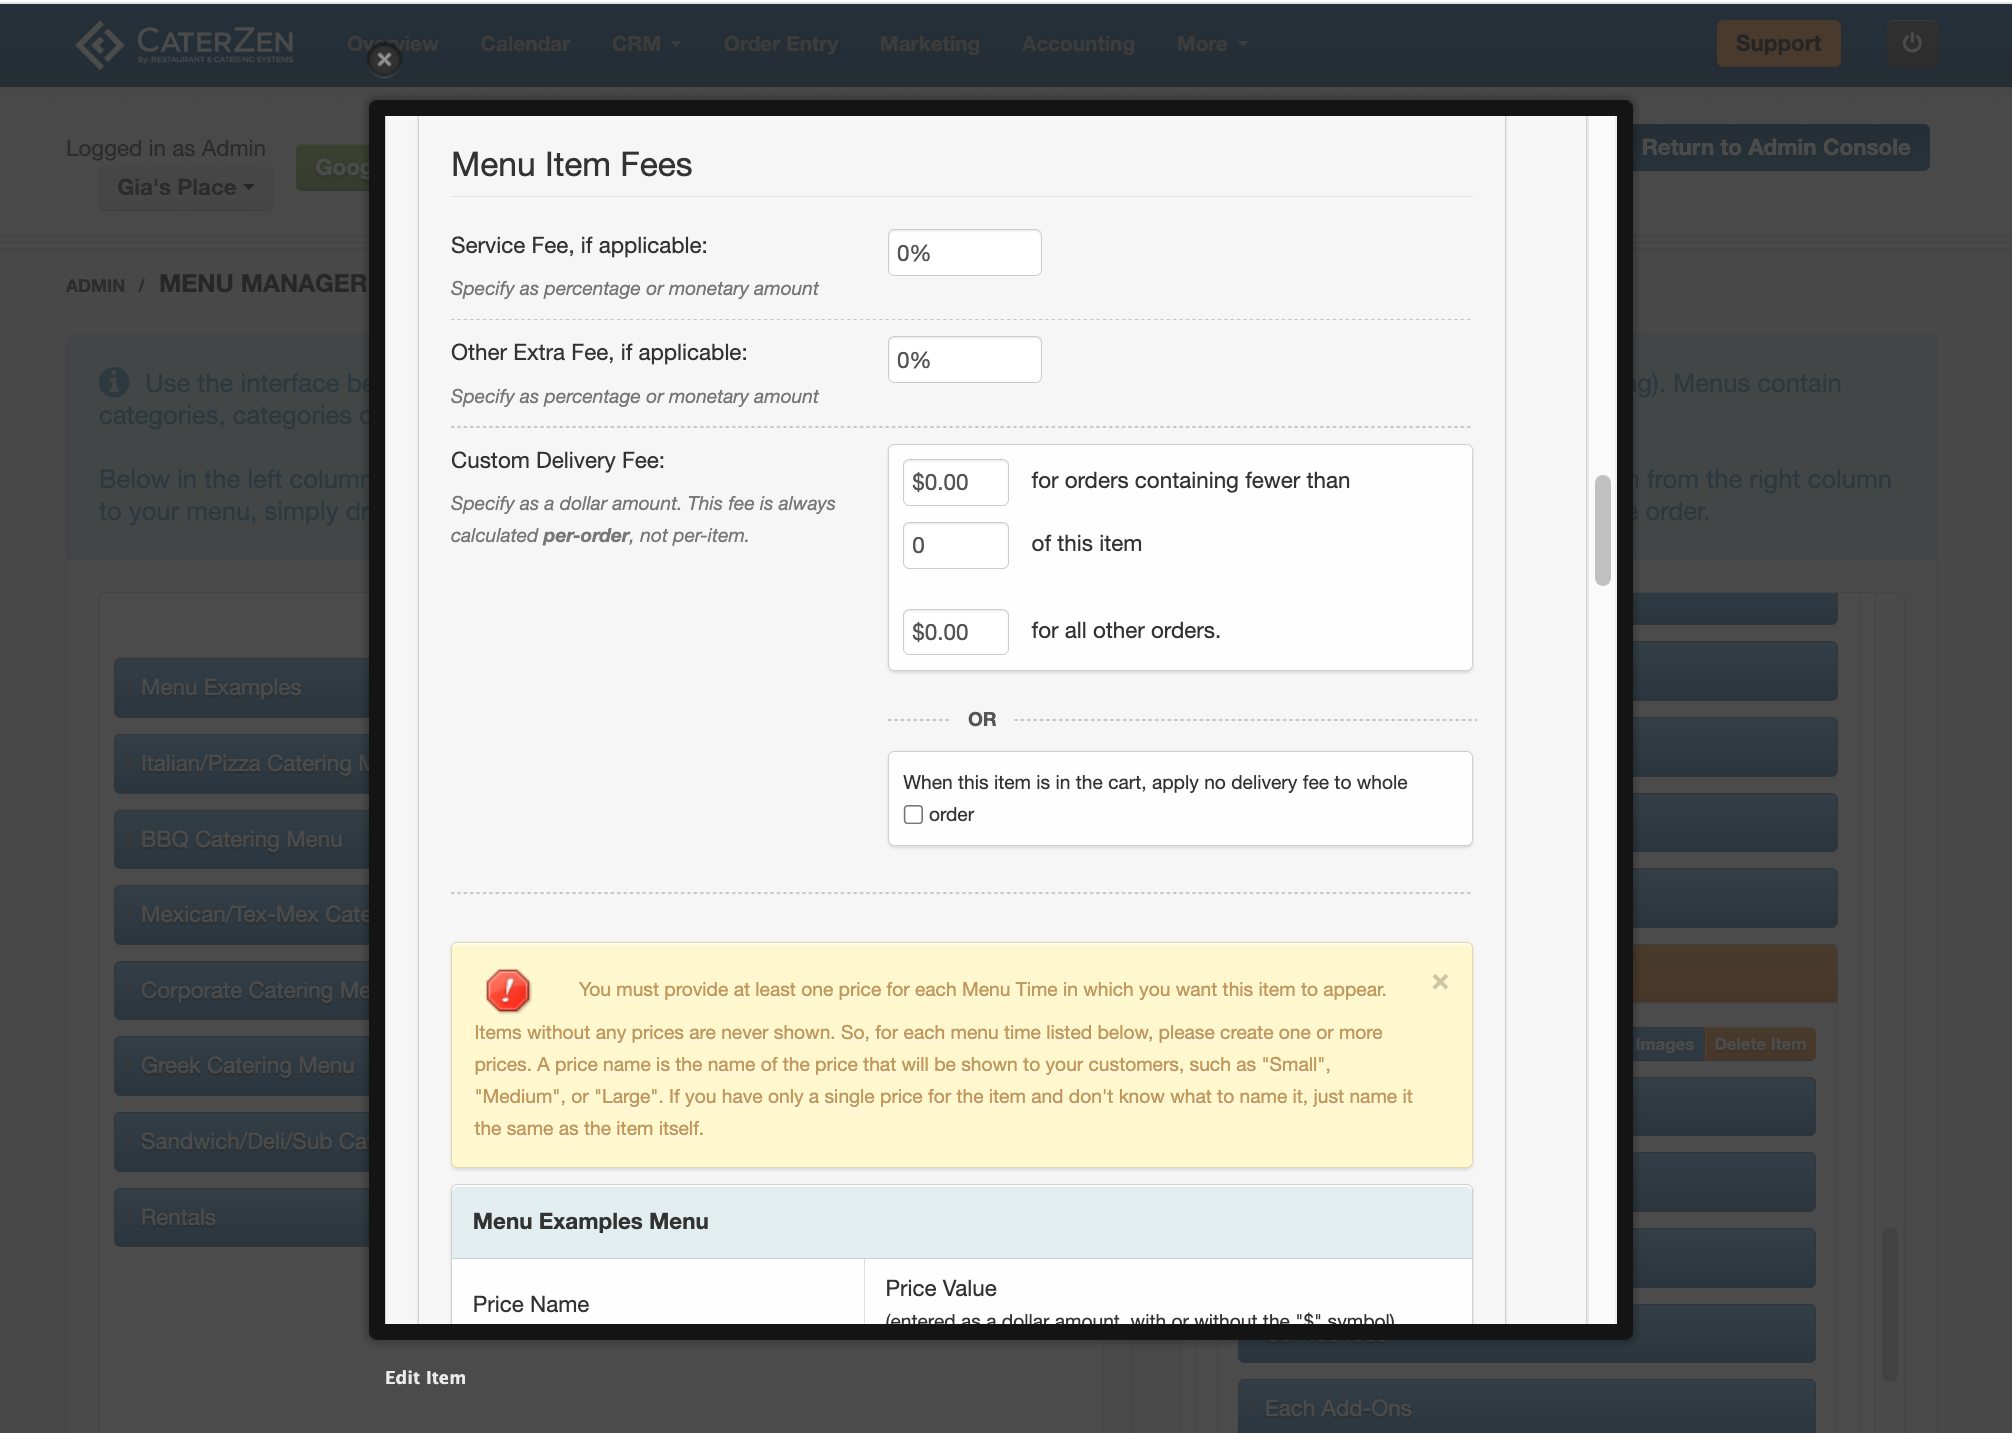
Service Fee
Adds a service fee specific to this item.
Other Extra Fee
Adds an additional fee separate from the service fee.
Custom Delivery Fee
Adds a delivery fee that applies only when this item is ordered.
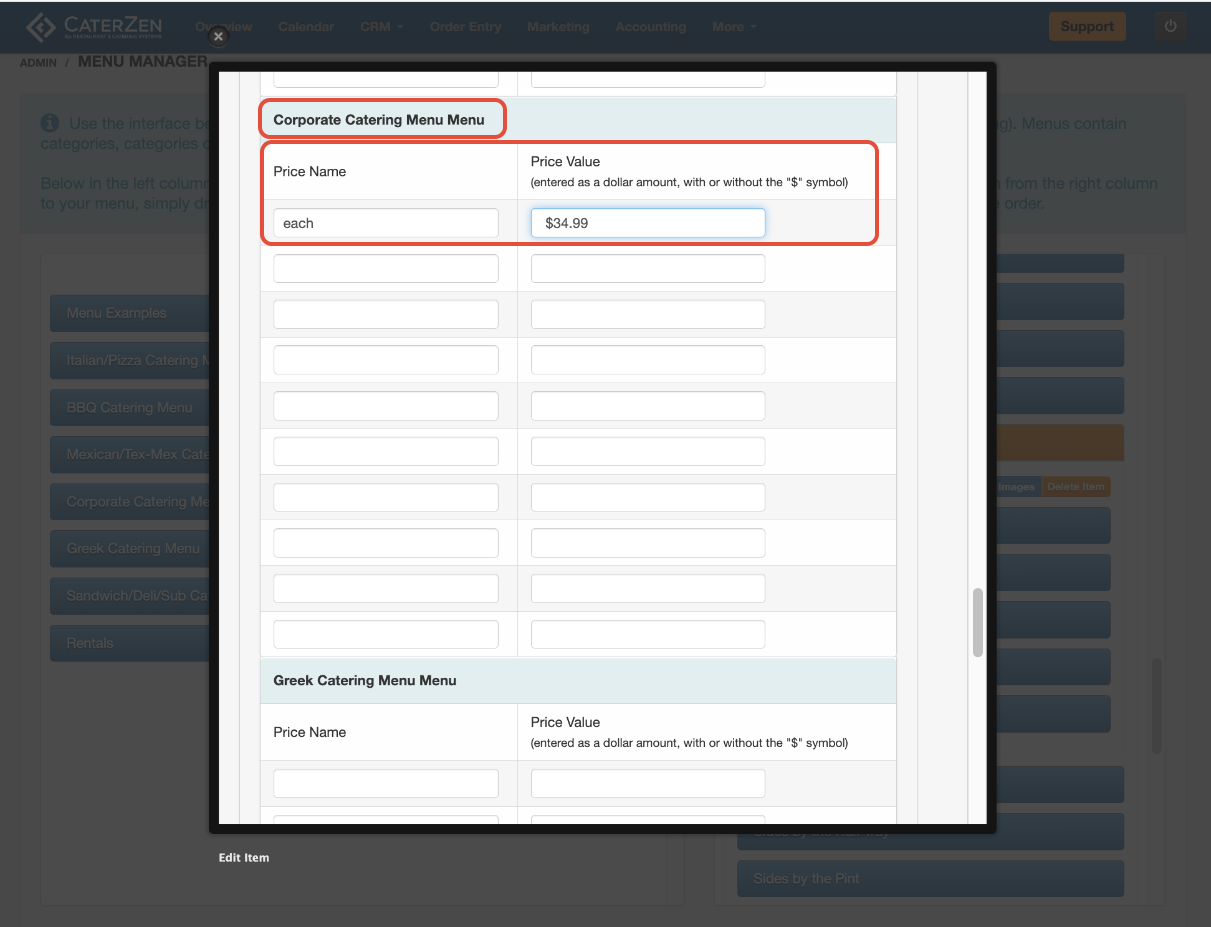
Add Pricing to the Menu Item
Scroll to the Pricing section
Locate the menu where the item should appear
Enter:
Price Name (Each, Per Person, Per Order, etc.)
Price Value
Repeat if the item should appear on multiple menus
Click Save This Information
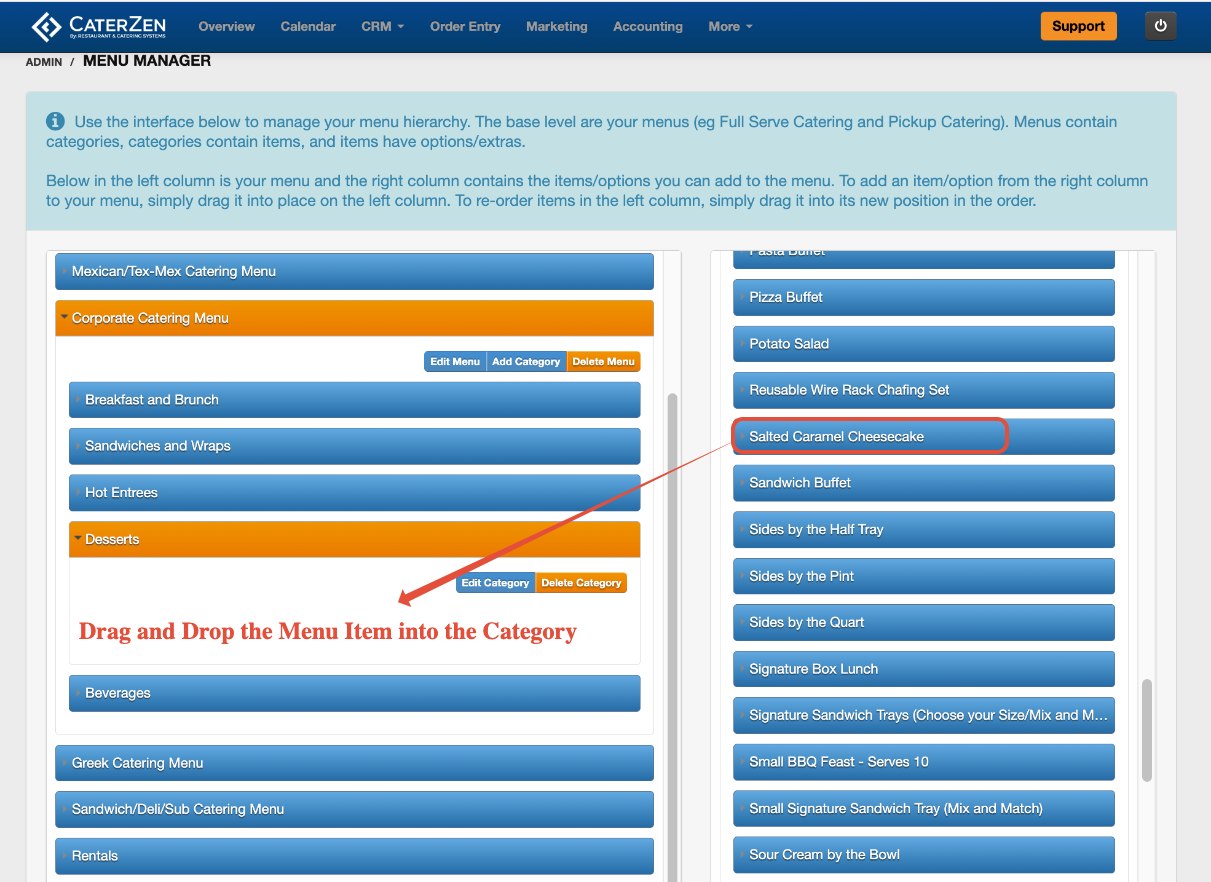
Add the Item to a Menu Category
After saving the item:
Keep the Items tab on the right open
Select the menu and category on the left you wish to add the item to
Find the new item in the item list on the right.(alphabetical)
Drag and drop the item into the category on the left
The item is now available during order entry.
Clearing Cache
After saving menu changes, you may see a yellow notice at the top of the Menu Manager screen indicating that recent updates may not be immediately visible. This happens because some menu data is temporarily cached for performance. Click CLICK HERE to clear menu cache.
You may need to manual clear the menu cache if you:
Added or updated a menu, category, or menu item
Changed visibility, order types, or permissions
Updated options, extras, or toppings
Adjusted pricing, prep times, or availability
Next Steps
After adding menu items, you may want to:
Add customization options
→ Menu Manager: Menu Item Add-Ons Overview (Options, Extras, and Toppings)Set inventory or pricing rules
→ Menu Manager: Pricing Tiers
→ Item Inventory: Limit How Many Items Can Be Sold Per DayAdd item images for Online Ordering
→ Menu Manager: Add Images to Menu Items
Editing an Existing Menu Item
Menu items can be edited at any time using the same fields and settings available during item creation.
To edit a menu item:
Go to Admin
Select Menu Manager
Locate the menu and category containing the item
Click the menu item name to open it
Choose Edit Item
Make your updates
Click Save
Edits take effect immediately once saved. Editing an item does not remove it from past orders.
Shown/Not Shown vs Delete
Shown: Item is available for ordering
Not Shown: Item is hidden but retained for reporting and future use
Delete: Item is permanently removed and should be used cautiously
For seasonal or temporary changes, we recommend setting items to Not Shown instead of deleting them.
Support
If a menu item isn’t appearing or you’re unsure which fields to use, CaterZen Support Center can help review your setup.
Not a CaterZen customer yet? Discover how our catering software can streamline your business — click here to learn more!