Overview
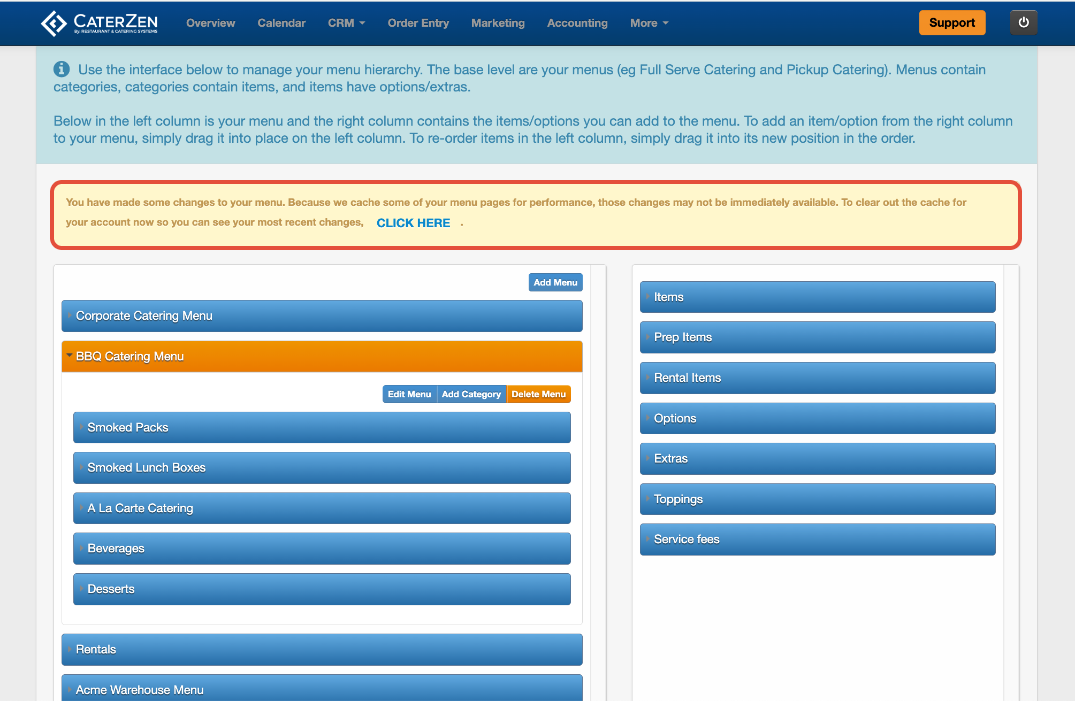
Menus control which items are available for ordering in CaterZen. All menus are created and managed in Menu Manager, but not all menus are visible to the same audience.
Menus follow a simple hierarchy:
Create a Menu
Each menu can contain one or multiple categories
Each category can contain unlimited menu items
Menus can also be configured for different visibility and use cases:
Customer-facing menus that appear in Online Ordering
Internal menus that are only available to logged-in employees during order entry
Permission-based menus that are only visible to selected Customers
This flexibility allows you to manage public menus, internal-only offerings, and restricted menus from one central place.
A menu must be created and assigned before it can be used in Order Entry or Online Ordering.
⚠️ Working in Multiple Browser Tabs
When making menu changes, we recommend working in a single CaterZen tab.
CaterZen can be opened in multiple browser tabs, but making menu changes in more than one tab at the same time can cause changes not to save correctly.
For best results:
Complete your menu changes in one tab
Save your changes and clear your menu cache before navigating elsewhere
Refresh your browser if you switch tasks
Accessing Menu Manager
Go to Admin → Menu
Select Menu Manager

Creating a New Menu
Click Add Menu

Complete the menu details:
Menu Display Name: Use clear, descriptive names, especially if you manage multiple menus. This name is what appears to Customers and employees unless hidden.
Examples: Corporate Catering Menu, BBQ Menu, Holiday MenuDescription or HTML Editor: Add details or a short description for the menu here. You can type your own text or paste in HTML code.
Create Menu Date/Time Rules: Use date and time rules to control when this menu is available. This is commonly used for holiday menus, limited-time offerings, or menus that should only appear on certain days.
Refer to Menu Manager: Menu Times for more details
Currently Shown At: Select the location(s) where this menu should be available.
If a location is not checked, the menu will not appear for that location.Is hown to Customers:
Controls whether the category is visible in Online Ordering:
- Shown: Customers will see this category
- Hidden: Category is internal-only for logged-in employees
- Permission Based Menu: Refer to Menu Manager: Permission Based Menus for more details
- Enable This Menu for These Order Types: Check the order types that should have access to this menu. Order types control where the menu appears, such as Catering, Pickup, or Delivery.
Hide “Display Name” on Page: Enable this option if you want only the menu image to display without showing the menu name text. This is commonly used for image-based menu buttons.
Image: Click Choose File to upload an image that will display as the menu banner or button.
Image requirements: Minimum size: 912 px x 256 px. Use a clean, wide image that crops well on different screens
Click Save This Information


Assigning the Menu
Creating a menu does not automatically make it available for ordering. Menus must be assigned to the appropriate:
Order types
Locations (if applicable)
Assignment determines where and when the menu can be used. If a menu is not assigned, it will not appear during order entry or online ordering.
Clearing Cache
After saving menu changes, you may see a yellow notice at the top of the Menu Manager screen indicating that recent updates may not be immediately visible. This happens because some menu data is temporarily cached for performance. Click CLICK HERE to clear menu cache.
You may need to manual clear the menu cache if you:
Added or updated a menu, category, or menu item
Changed visibility, order types, or permissions
Updated options, extras, or toppings
Adjusted pricing, prep times, or availability
Next Steps
After creating your menu, follow these steps in order:
Create menu categories
Categories must be created before menu items can be added. Categories control how items are grouped and displayed during order entry and online ordering.
→ Menu Manager: Create Menu CategoriesAdd items to the menu
Once categories exist, you can begin adding items to the menu.
→ Menu Manager: Add a Menu ItemConfirm menu assignment
Make sure the menu is assigned to the correct order types and locations.Set inventory limits if needed
Use inventory levels to prevent overselling items on busy days.
→ Item Inventory Levels: Limit How Many Items Can Be Sold Per Day
Support
If a menu isn’t appearing or you’re unsure which fields to use, CaterZen Support Center can help review your setup.
Not a CaterZen customer yet? Discover how our catering software can streamline your business — click here to learn more!