
Overview
Email campaigns help you stay connected with Customers, follow up with prospects, promote seasonal menus, or encourage repeat business. CaterZen’s Email Marketing tools allow you to create and send targeted email campaigns using the contacts already stored in your CRM.
You can customize the message, choose exactly who should receive it, send yourself a preview, and either send the campaign immediately or schedule it for a future date and time.
Before You Start
- Confirm that the contacts you want to email are saved in your CaterZen CRM.
- Create any CRM groups you want to use for targeting before beginning the campaign.
- Have your subject line, email copy, images, links, and reply-to email address ready.
- Plan to send yourself a preview before finalizing the campaign.
Create a New Email Campaign - Step 1: Open Email Marketing
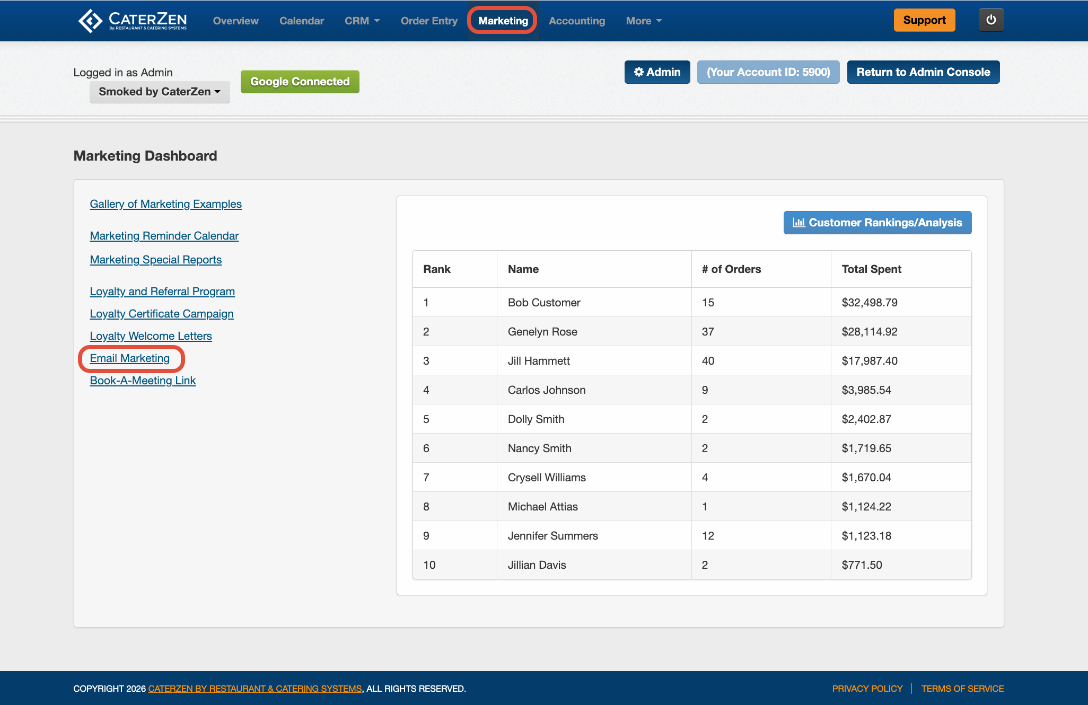
From the main navigation menu:
- Click Marketing.
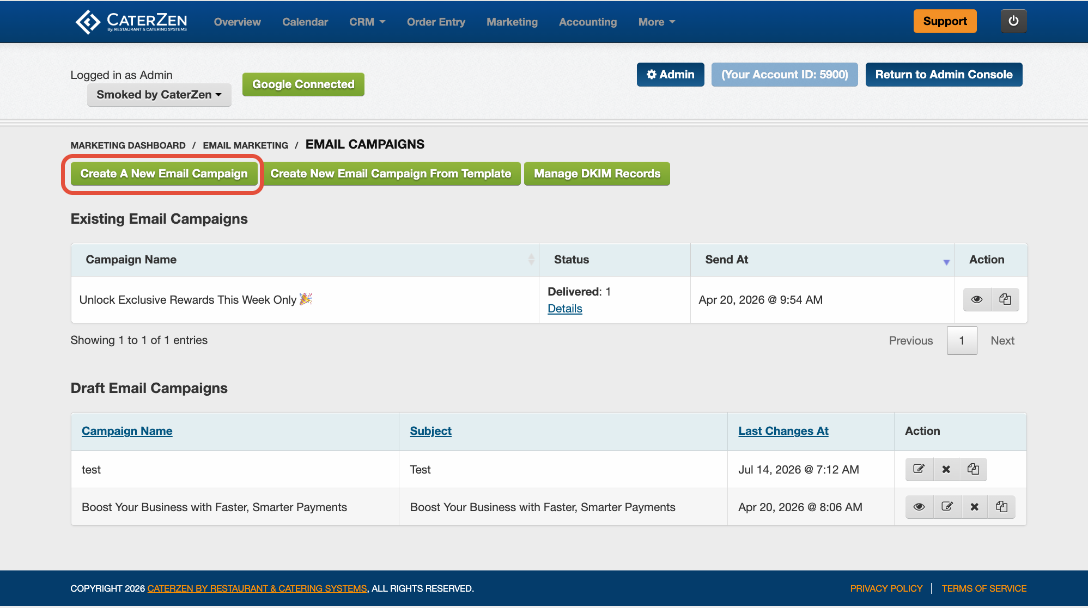
- Click Email Marketing.
- Click Create a New Email Campaign.
Step 2: Enter the Campaign Details
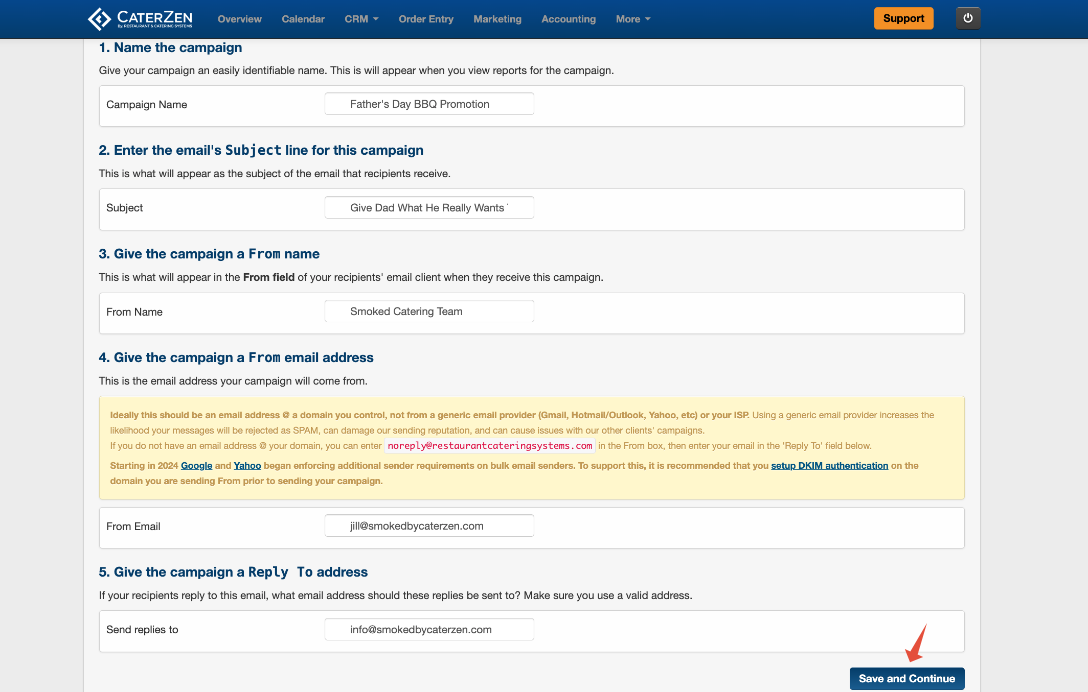
Complete the basic campaign information:
- Campaign Name: Enter an internal name that will help your team identify the campaign in reports. Customers will not see this name.
- Subject: Enter the subject line Customers will see in their inbox.
- From Name: Enter the person or business name that should appear as the sender.
- From Email Address: Enter the email address that should appear in the From field.
- Reply-To Email Address: Enter the email address that should receive Customer replies.
Click Save and Continue.
Step 3: Create the Email Message
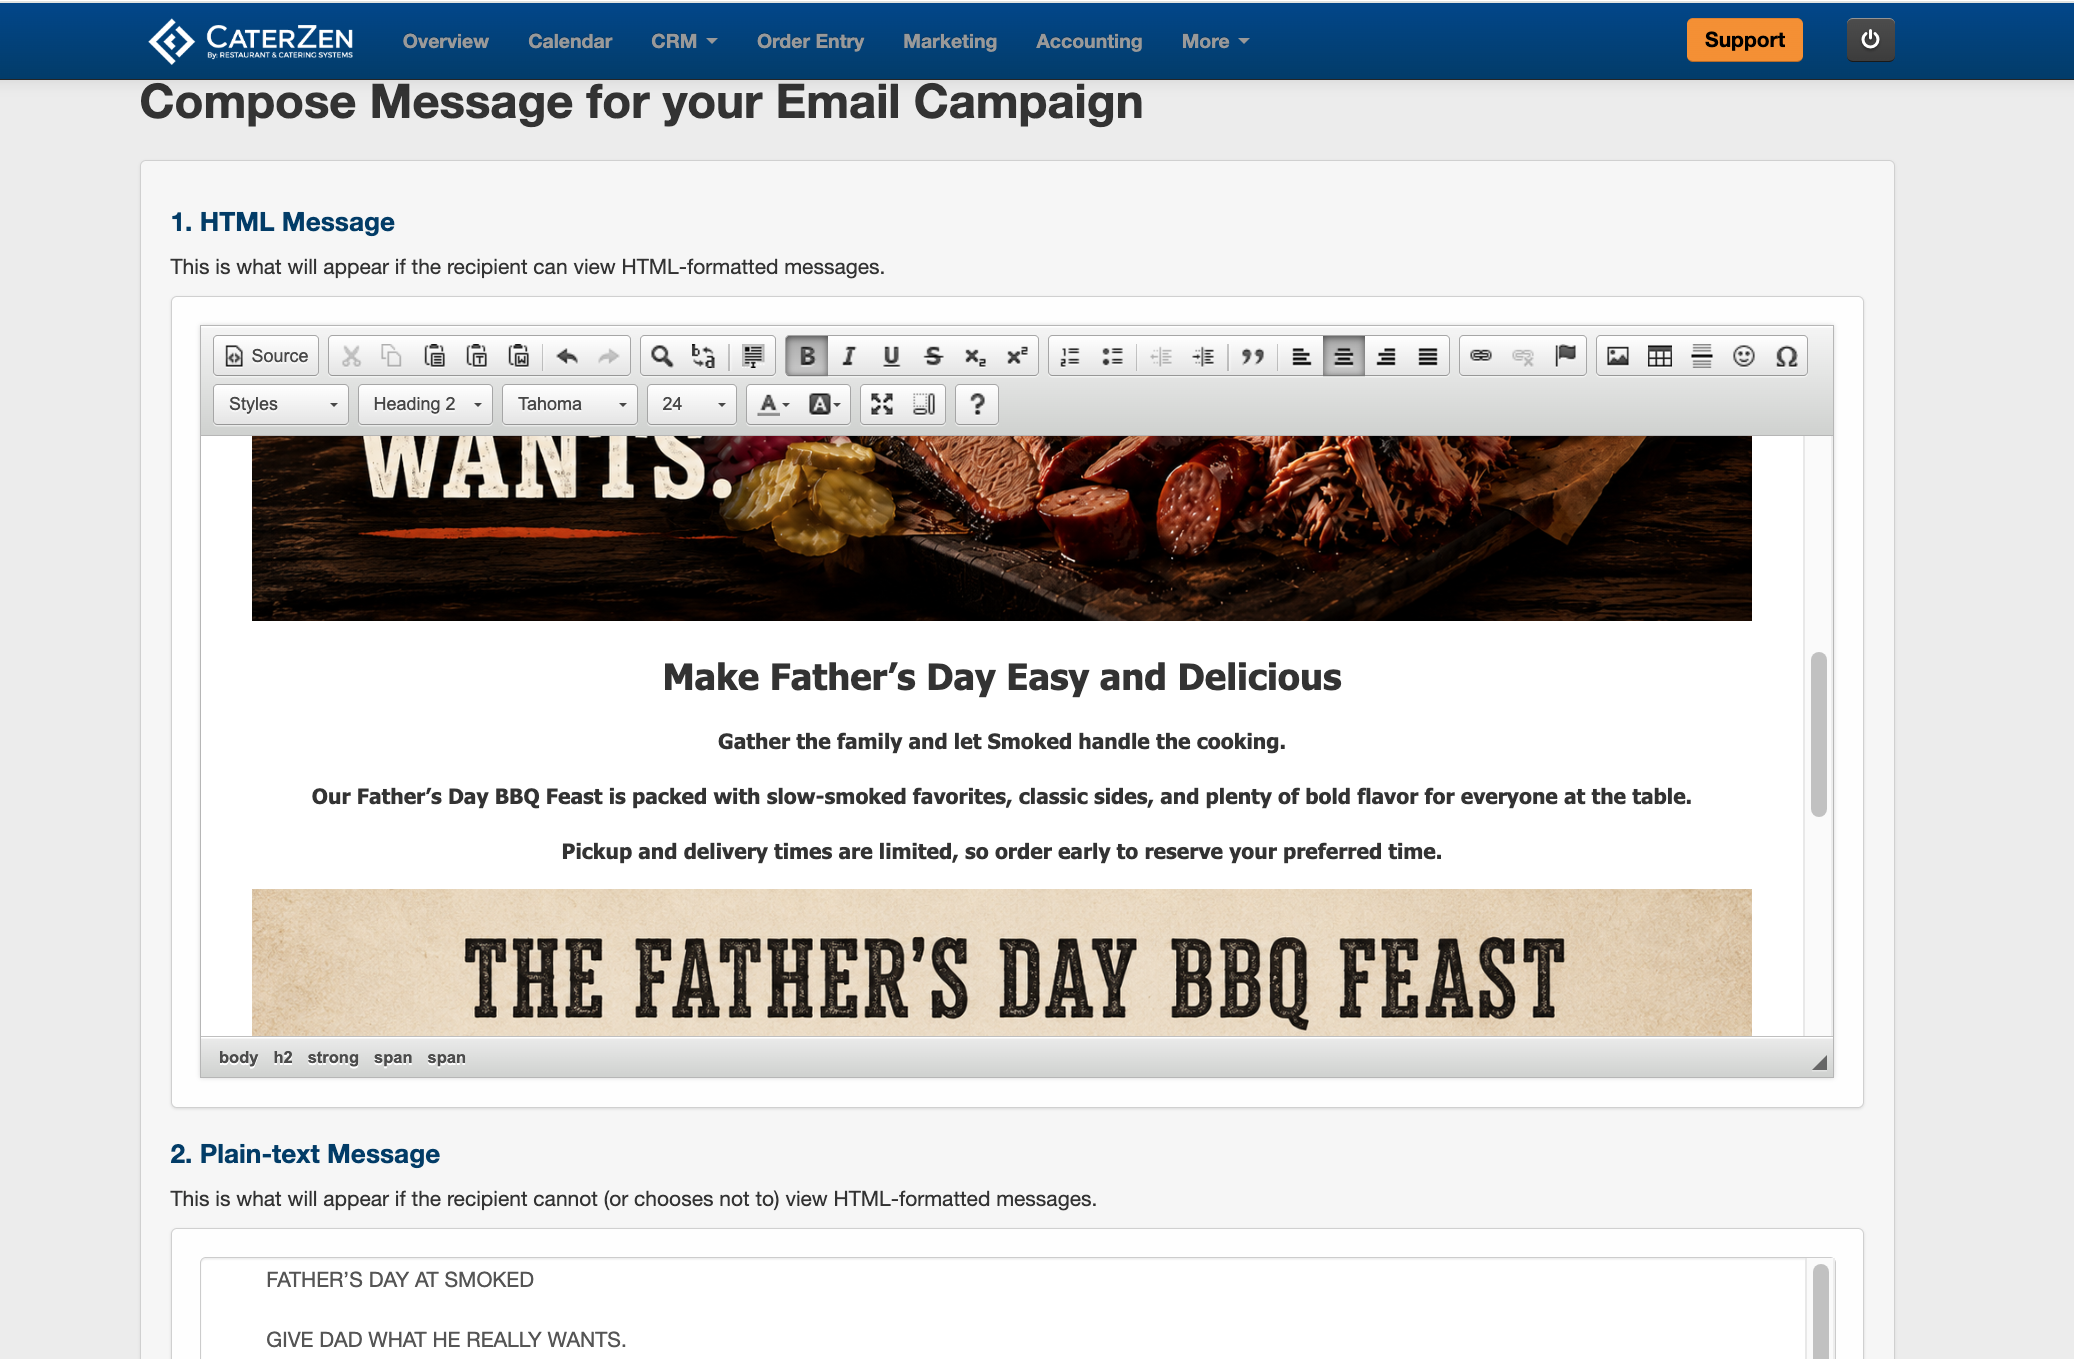
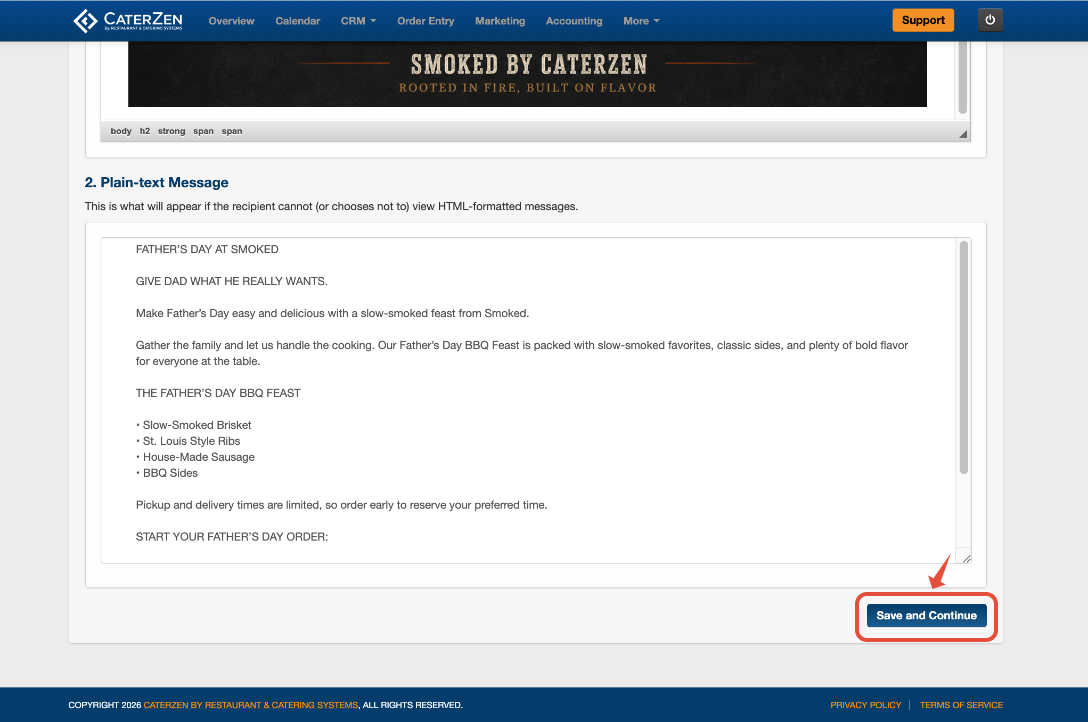
Create both versions of your message:
- HTML Email Message: This is the formatted version most recipients will see. Add your text, images, links, and other formatting here.
- Plain Text Email Message: This version is used when a recipient cannot or chooses not to view HTML-formatted email.
Review both versions, then click Save and Continue.
Step 4: Select the Recipients
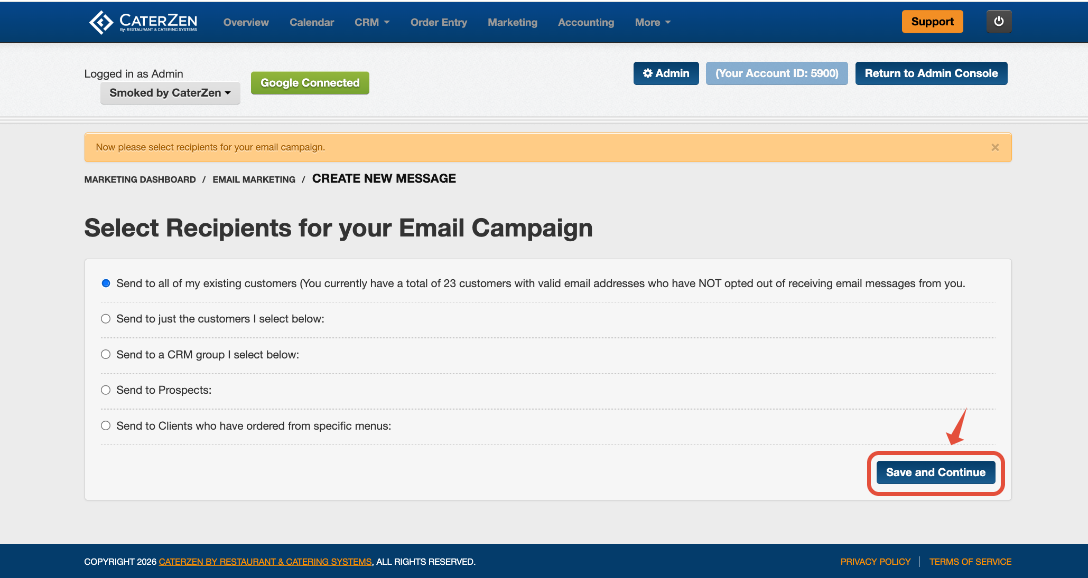
Choose who should receive the email campaign. Available recipient options include:
- Everyone in Your CRM: Sends the campaign to all eligible CRM contacts.
- Specific People: Allows you to select individual contacts.
- CRM Groups: Sends the campaign to one or more groups you have created in the CRM.
- Prospects: Sends the campaign to contacts marked as prospects.
- Customers Who Ordered From a Specific Menu: Targets Customers based on the menu used for a previous order.
After choosing the recipients, click Save and Continue.
Step 5: Choose When to Send the Campaign
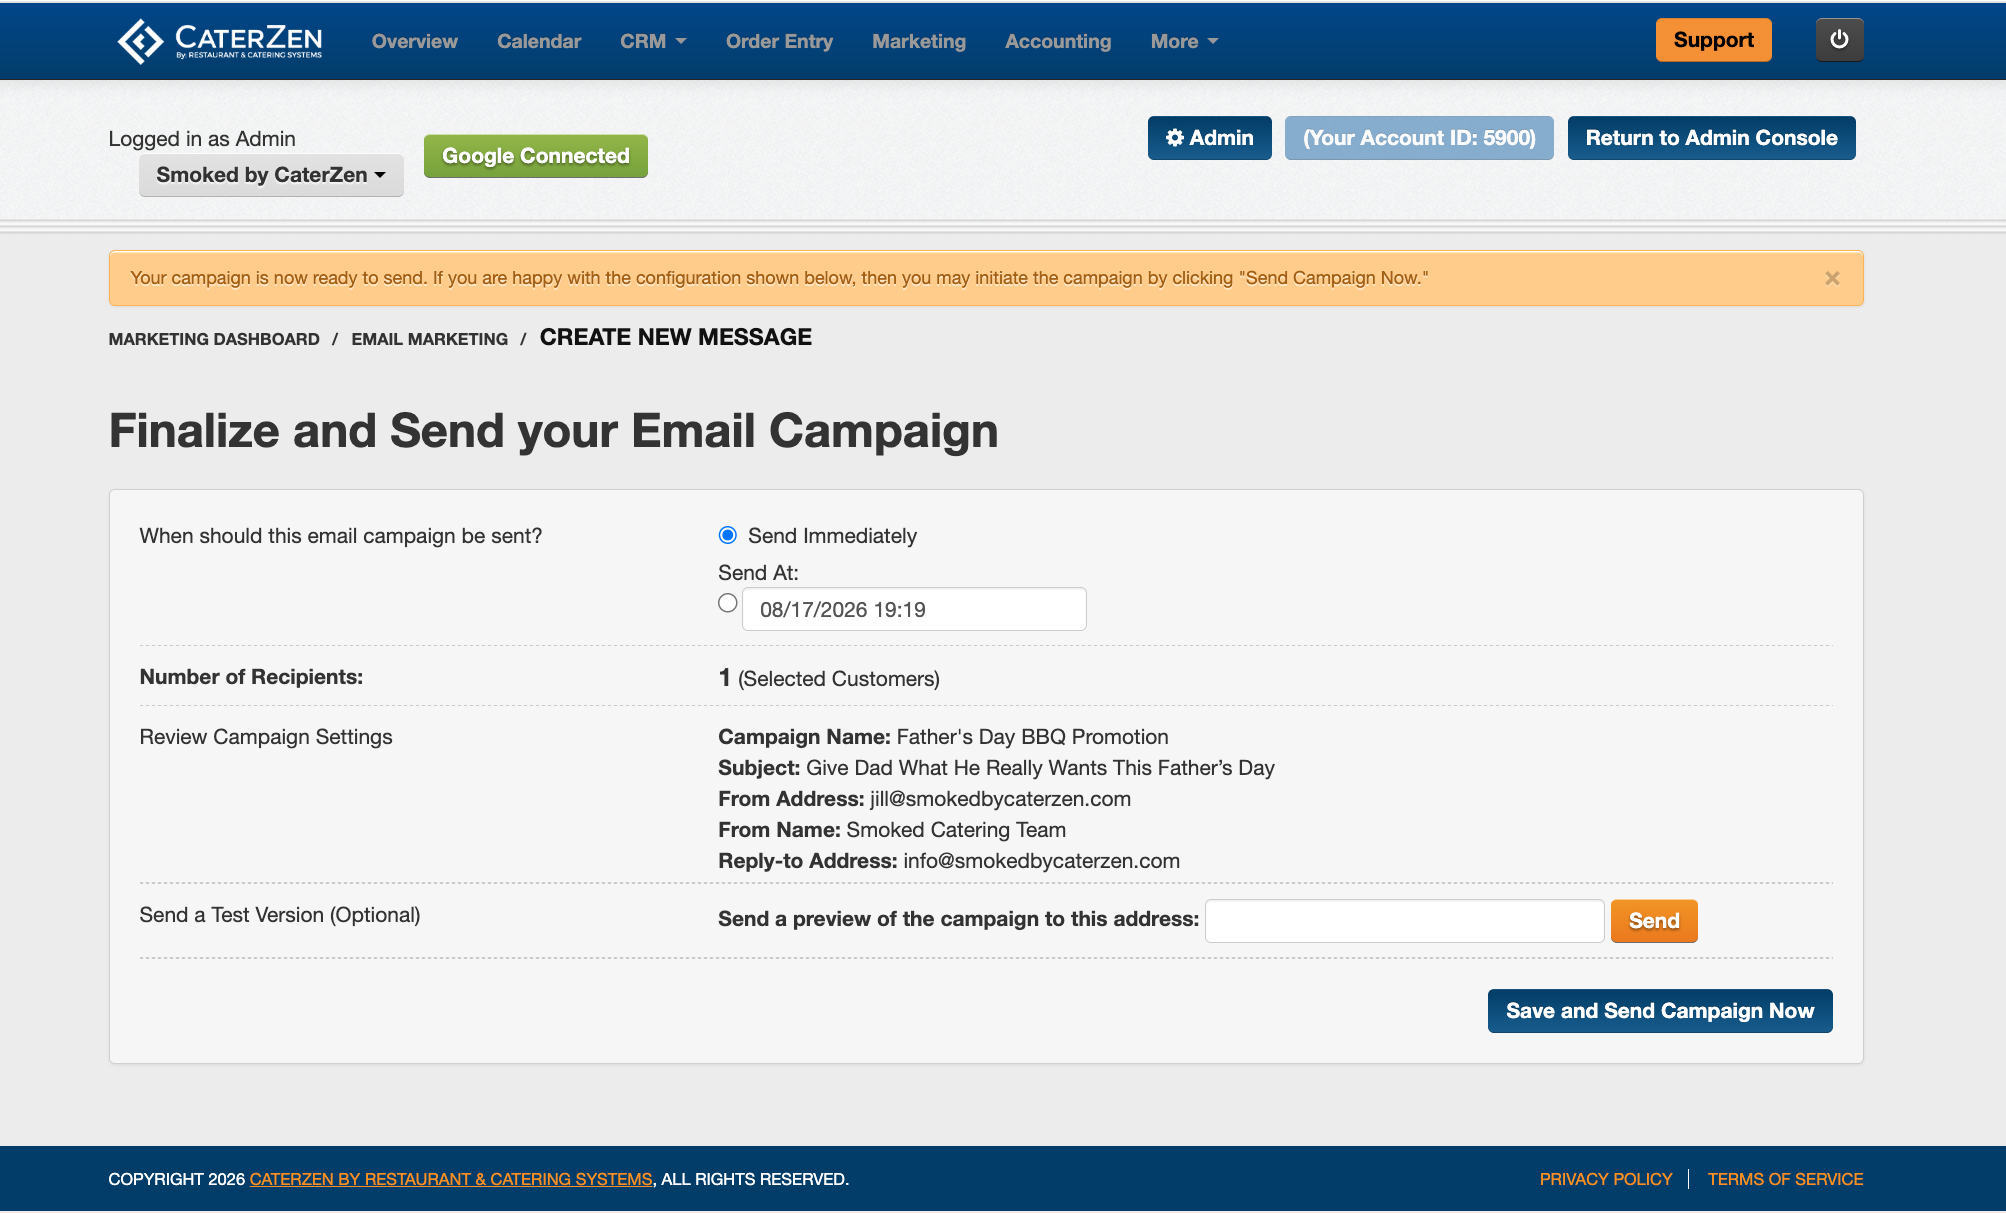
Select one of the available delivery options:
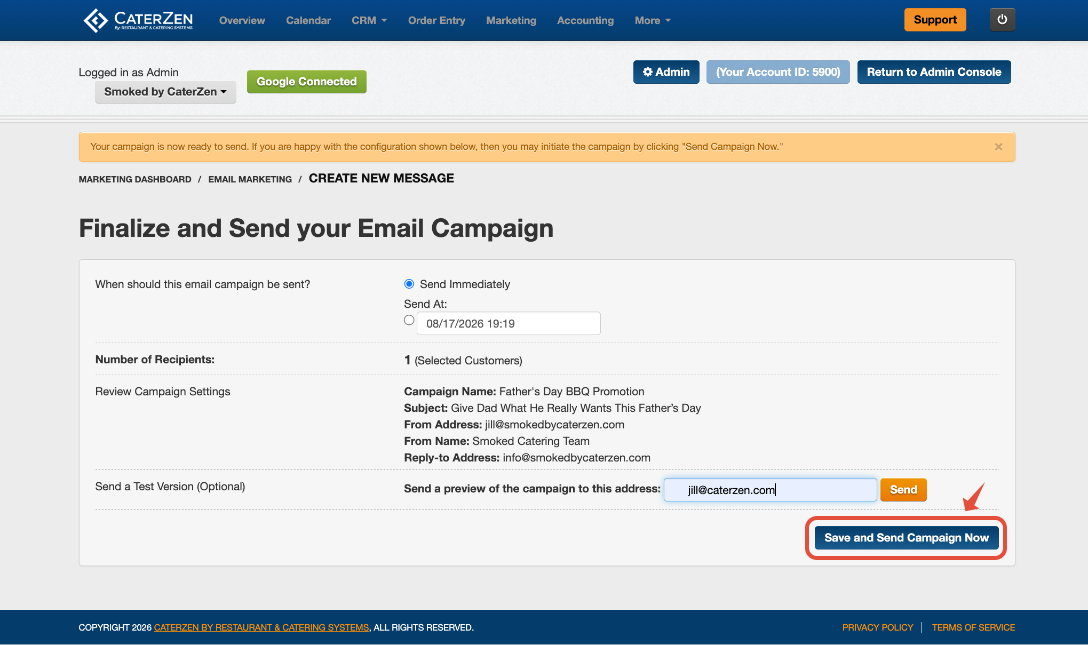
- Send Immediately: Sends the campaign after you complete the final review and activate it.
- Send at a Specific Time and Date: Places the campaign in the queue to send at the date and time you select.
Step 6: Review and Preview the Campaign
Carefully review the campaign settings, recipients, message, links, and scheduled delivery time.
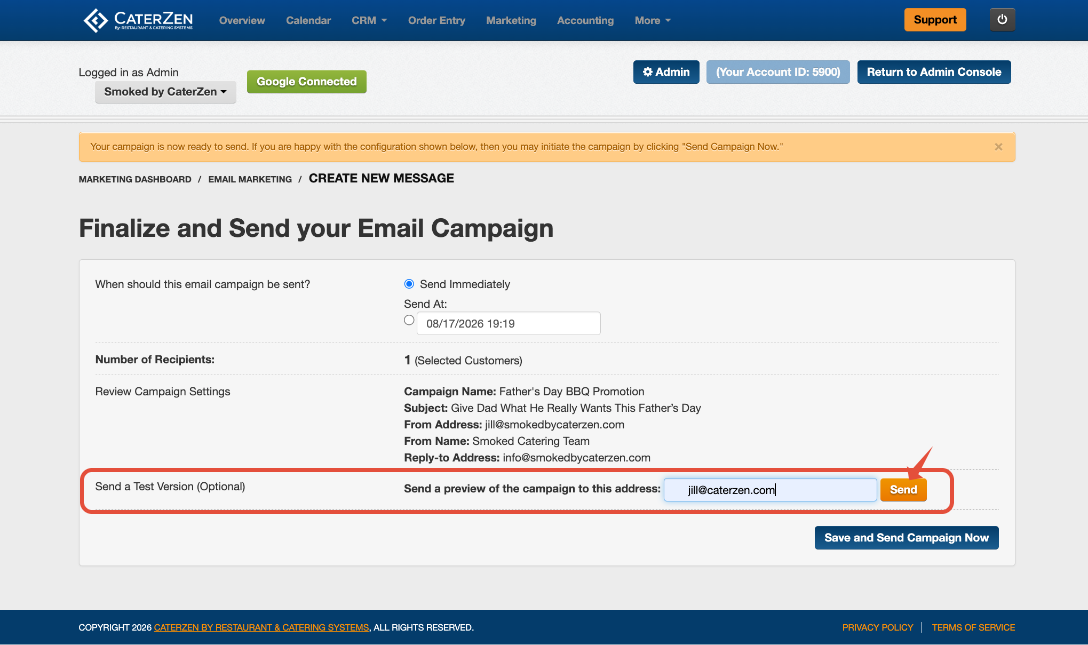
To send yourself a test version:
- Under Send a Test Version of This Campaign, enter the email address where you want to receive the preview.
- Click the orange Send button.
- Open the test email and review it on both a computer and mobile device.
- Check the formatting, spelling, images, and recipient-facing information. Test each link to confirm it opens the correct page.
Make any necessary changes before sending or scheduling the final campaign.
Step 7: Finalize the Campaign
Once everything is correct, click Save and Send Campaign Now.
If you selected a future date and time, finalizing the campaign places it in the queue to send at the scheduled time.
Important: Confirm the recipient selection and send time before finalizing the campaign.
Support
For additional help, refer to the CaterZen Support Center or contact our CaterZen Support Team.
Not a CaterZen Customer yet? Discover how our catering software can streamline your business — click here to learn more!